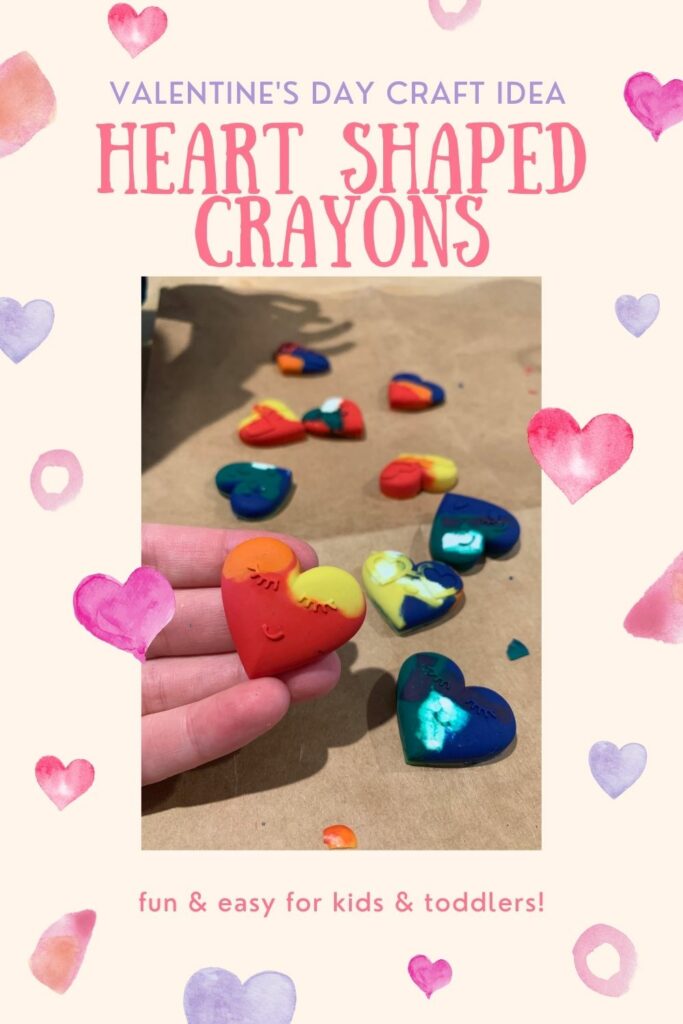
Want to make heart shaped crayons for Valentines Day? This is a great craft idea for Valentines day with your kids!
I have a friend who lives in Florida (sadly, I wish she still lived here!) who has kids almost exactly my kids ages. Our youngest had due dates one day apart!
Anyways, her sister is an elementary teacher and let me tell you, her and her sister come up with some amazing kids craft ideas. They keep their girls so busy in a really fun way.
She has really inspired me to do more fun crafts and holiday activities with Luke. He's just getting to the age where he enjoys it.
Don't get me wrong - some activities he just runs away from.
But short, sweet activities are a great way to mix up our mornings.
I laughed when my friend told me she was making shaped crayons in the oven, because this is something that I used to do with my mom in the 90's!
We just used muffin tins back then, but shaped silicone molds are so prevalent and cheap now, you can make these crayons for any holiday.
I love that you can use up broken or "recycled" crayons for this project.
You could also break up shapes from one holiday and melt them into the next holiday shape! Ha ha
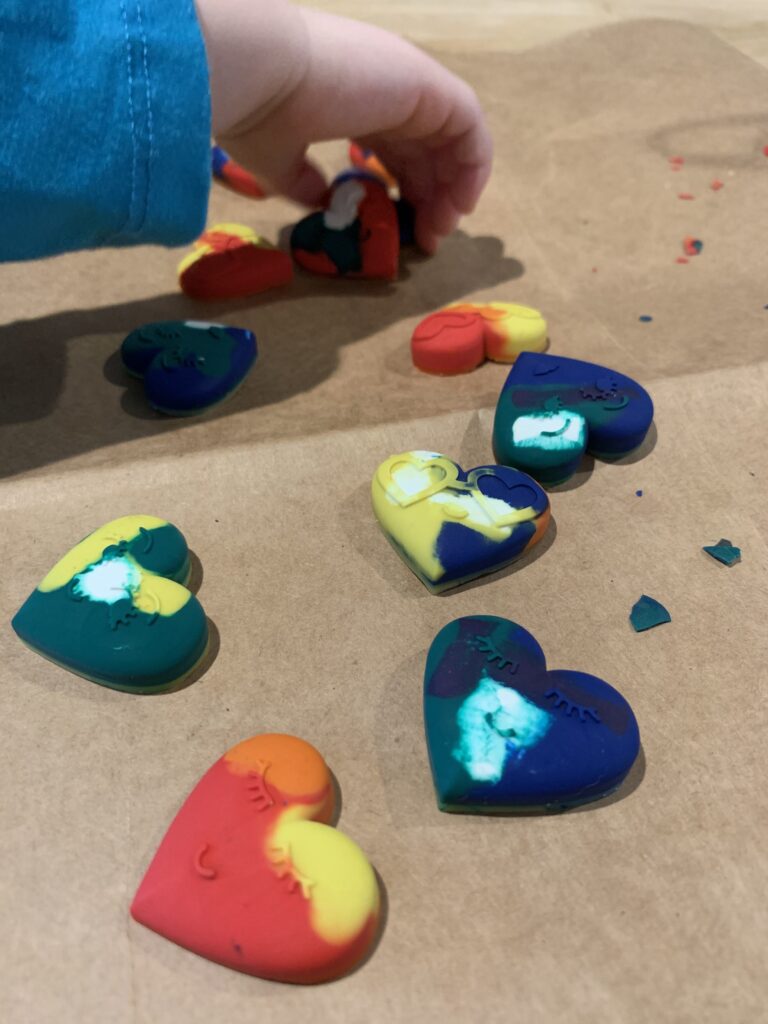
Anyways, Luke loved this activity and he has been loving coloring with the crayons ever since. It's a great easy kids craft that will never go out of style!
How to make heart shaped crayons
Supplies needed:
- Crayons
- Heart shaped silicone mold
- Oven
- Freezer (optional)
- Crayon Printable Valentine (free download!)
Where to get heart shaped silicone molds:
Steps:
STEP 1: Pre-heat the oven
Preheat your oven to 250 degrees.
STEP 2: Prep the crayons
First you will need to prep your crayons. If you are using regular crayons, you will need to remove the wrappers.
Soaking the crayons in water for 30 minutes first can make it easier.
You also can use an exacto knife or scissor blade to slice each label lengthwise to make them easier to peel the paper off.
But, easiest is my favorite hack: buy unwrapped crayons.
They only come in 9 colors, but it's so much more convenient. Whoever started selling these had a great idea!
Break each crayon into pieces 1 inch or smaller in length. The smaller your molds, the more small pieces you will need.
This is a fun step for kids to do! My 2 year old could break the crayons in half, smaller pieces were a little harder for him.
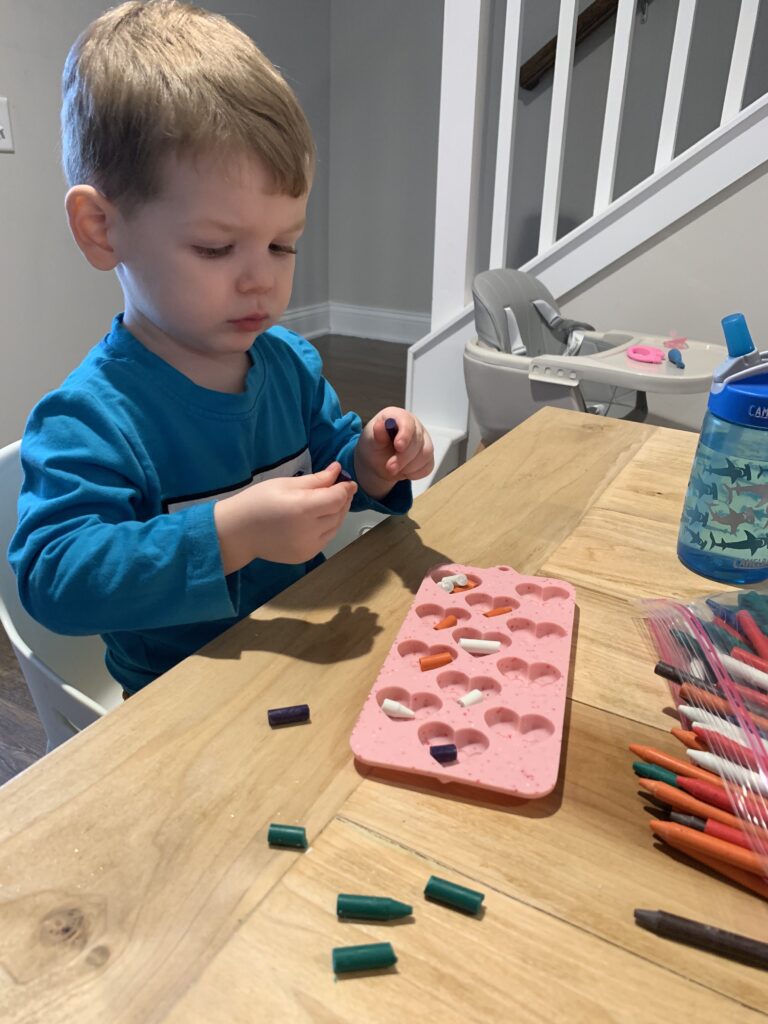
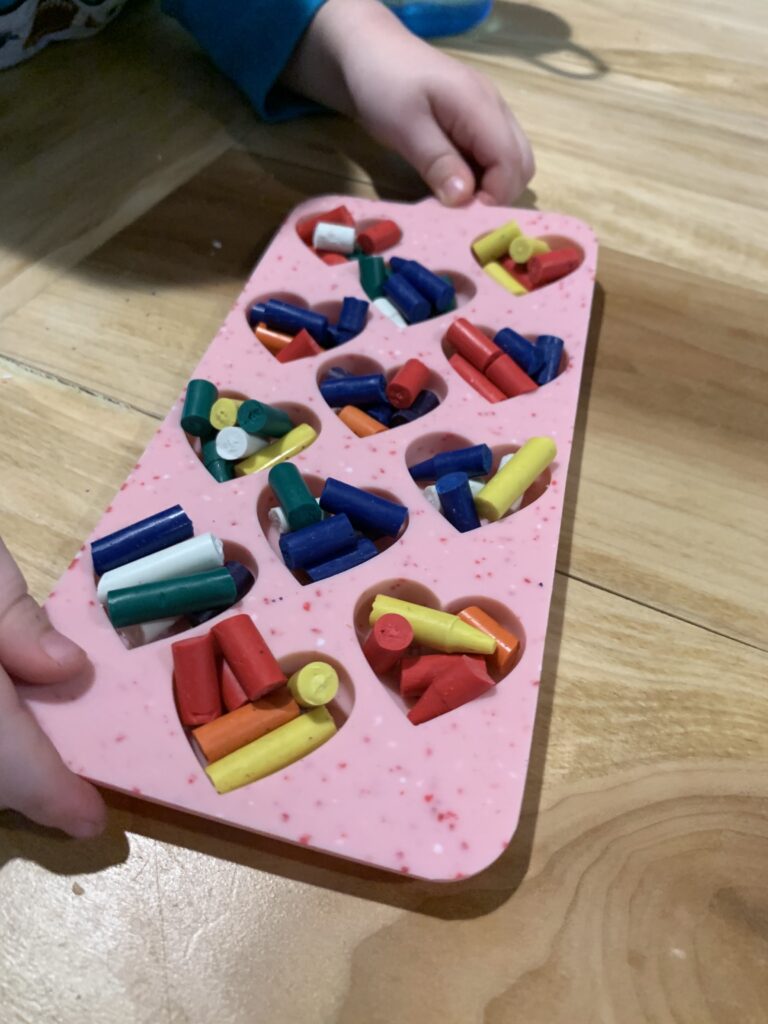
STEP 3: Fill the molds
Add the crayon pieces to the molds. You want them to be overflowing because when the crayons melt, they "shrink", or really just have to fill all the gaps between the whole crayons.
Fill each heart mold with the broken crayon colors of your choice.
I personally like the look of 2-3 colors per mold, but I let Luke take the lead so some ended up with all the colors. Whatever!
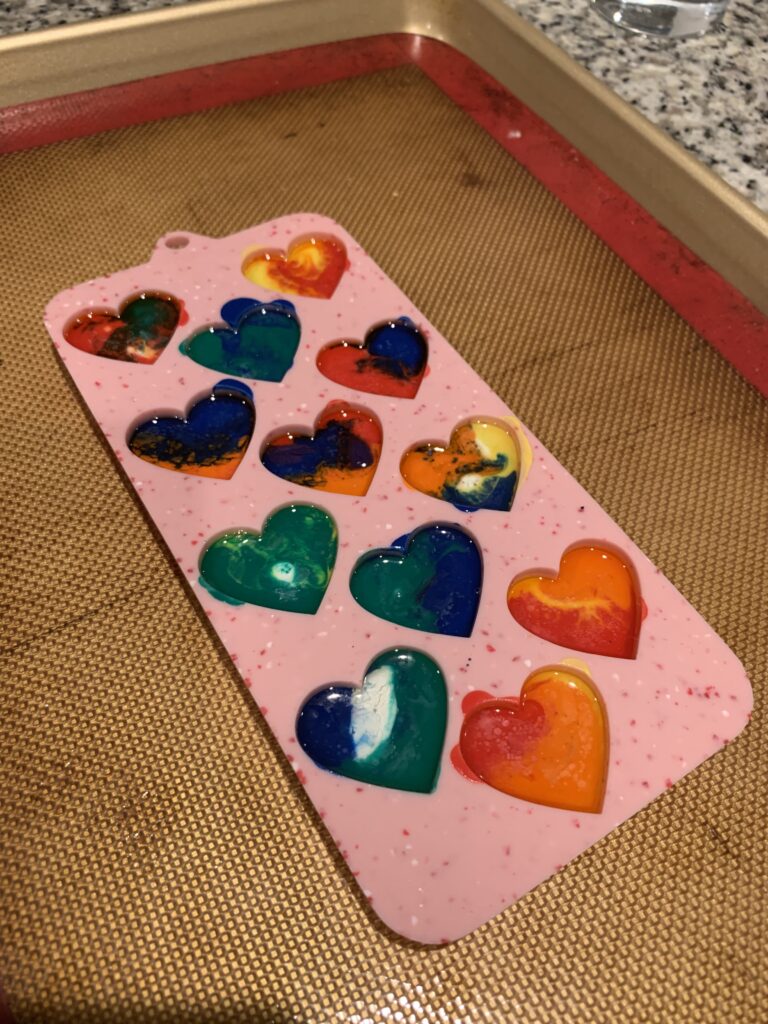
STEP 4: Melt the crayons
Place the silicone mold in the oven. I prefer to first put the mold on a baking sheet, just for added stability.
Bake for 15-20 minutes, until completely melted.
Love melting crayons? Check out my hair dryer melted crayon art!
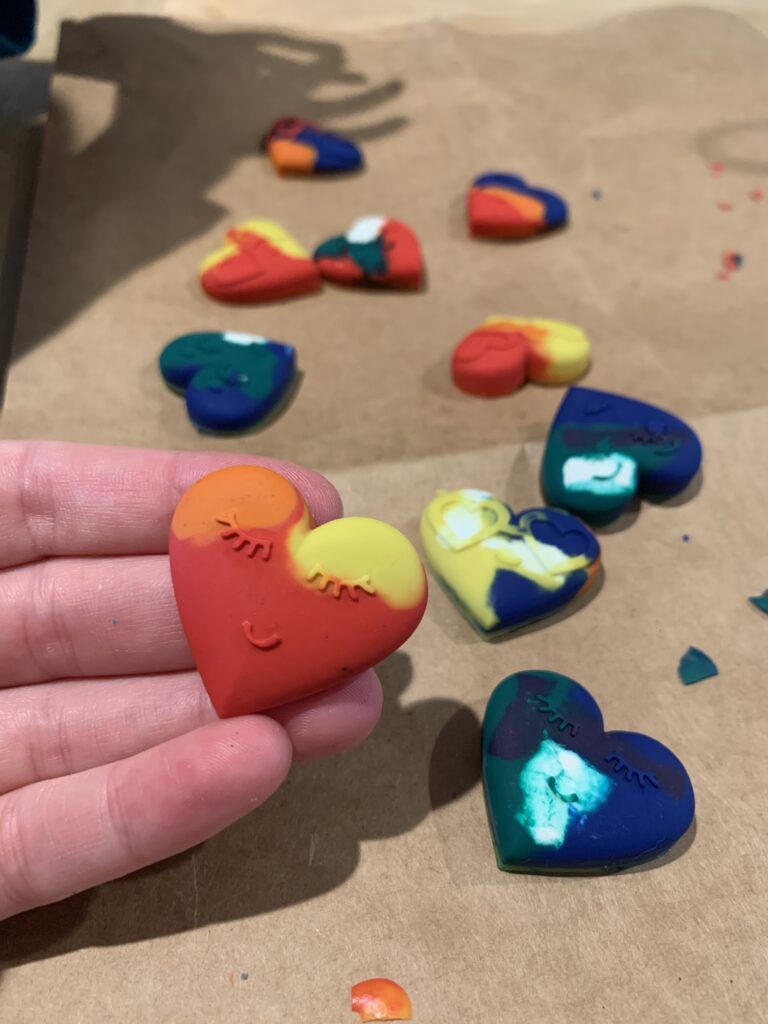
STEP 5: Optional: Freeze
When the crayons are out of the oven, I actually like to put them in the freezer. Make sure you have a cleared out, flat space.
This will allow them to solidify quickly and very firmly!
STEP 6: Optional: Attach to Valentines
We didn't give out valentines this year (we are staying at home, no preschool anymore!) but if you wanted to, you could use hot glue to attache the heart crayons to valentines!
What DIY crayon shape should we make next?
Thanks for reading!

Hey there, I'm Morgan, the creative mind behind CelebratingWithKids.com! As a parent of two lively little ones, I've made it my mission to turn ordinary days into extraordinary adventures, sharing playful activities, thoughtful toy reviews, and delightful printables to help families celebrate every moment together. 🎉👨👩👧👦🎈