Make oversized pool noodle hearts for your yard with this easy Valentine’s Day DIY. A budget-friendly, eye-catching outdoor decoration that’s fun to make and even more fun to display.
February is such a dreary month, I am always looking for a way to make it more cheerful and fun for my family. Valentine's Day is an obvious excuse to get cute.
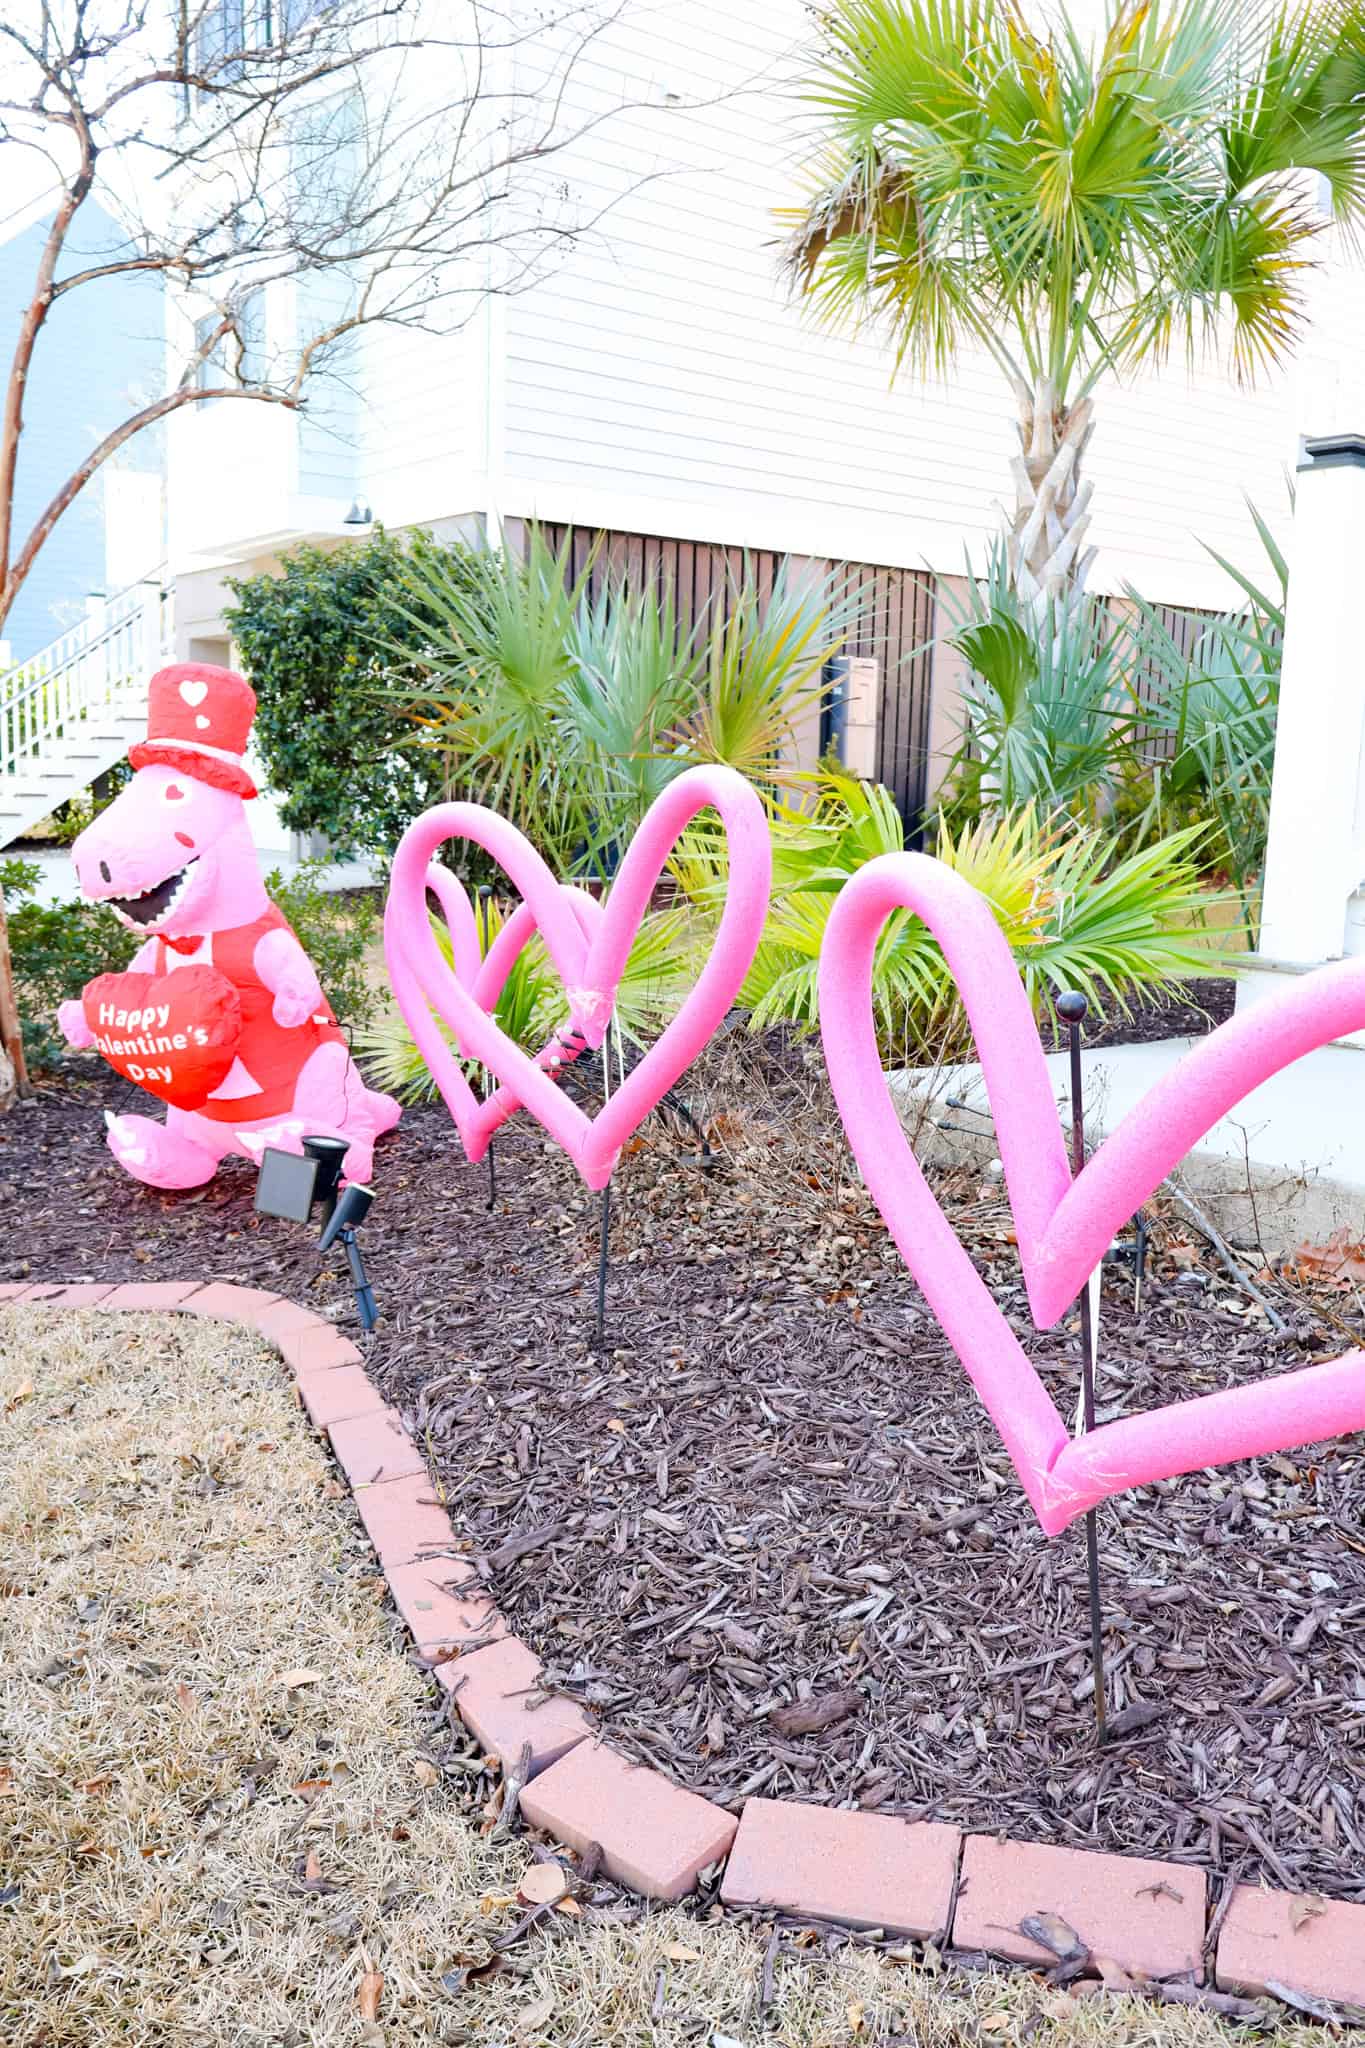
Last year I bought a bunch of small inflatables to decorate our yard for the more minor holidays in spring.
This year I decided to take our Valentine's Day yard decor up a notch with some big hearts made out of pool noodles!
How to make XL Pool Noodle Hearts
Here's how to make these big, dramatic hearts out of pool noodles!
Supplies needed:
This is the quantities needed to make 1 heart
- 2 pink or red pool noodles
- clear packing tape
- clear scotch tape
- a pencil or other sharp pencil-like object
- 4 zip ties
- scissors
- cutting board
- large serrated knife

Steps to make:
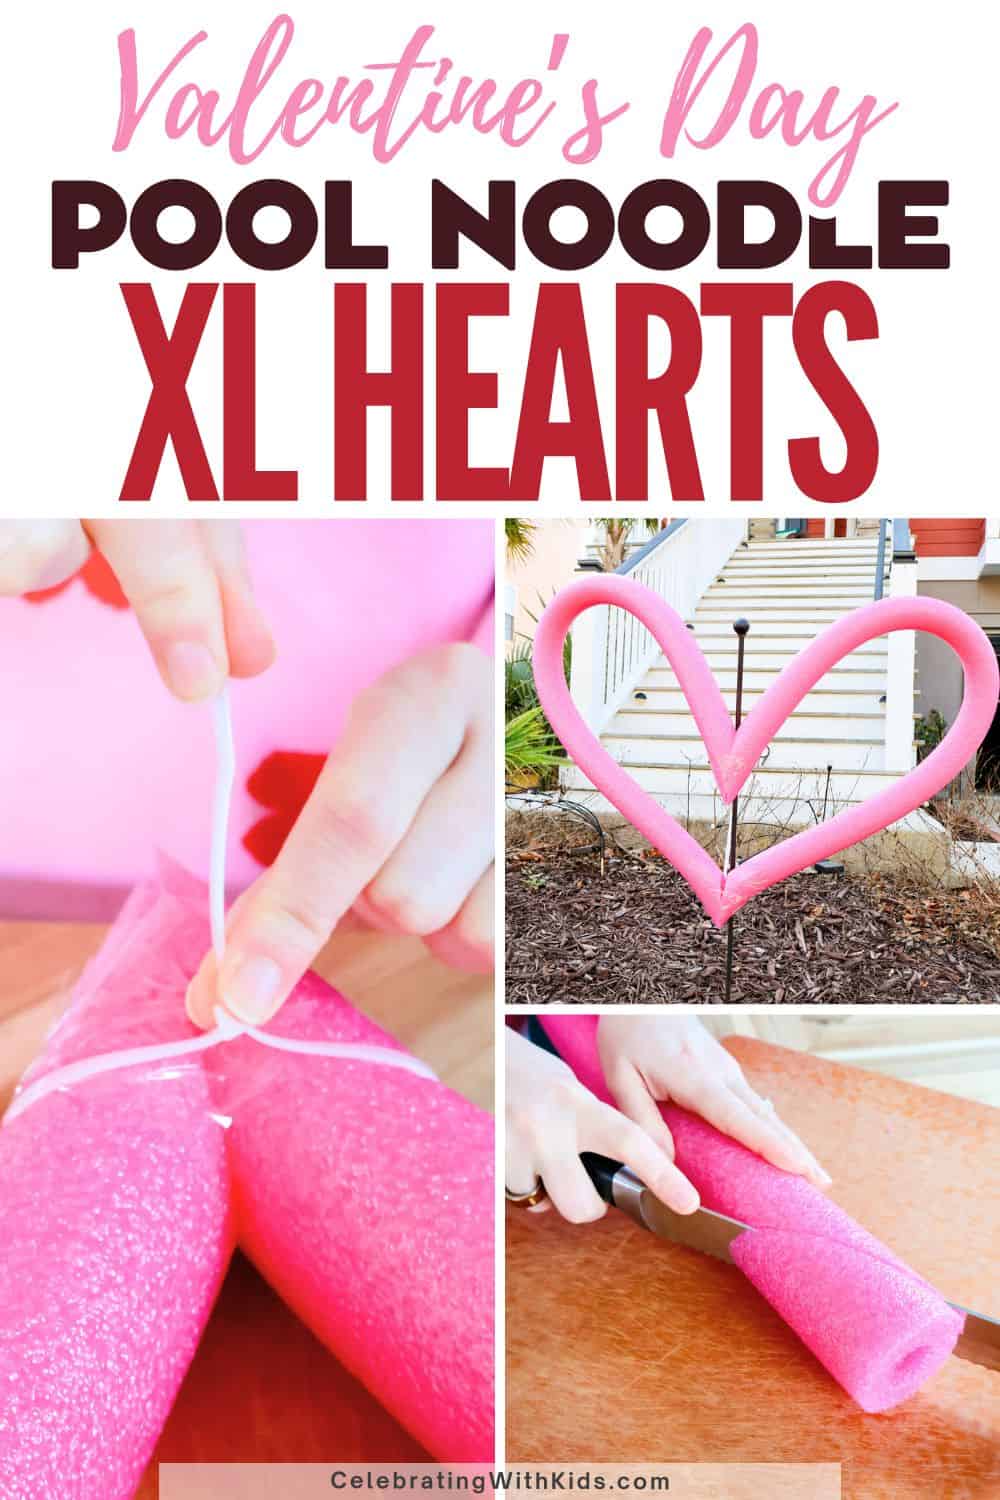
STEP 1: Cut the noodles
Start by preparing your pool noodles. If they have price stickers on them, carefully peel them off and throw them away.
Then lineup your two noodles so that the ends are lined up evenly.
You are going to want to use your knife and cutting board to cut a diagonal approximately 45° cut at the bottom of each noodle.
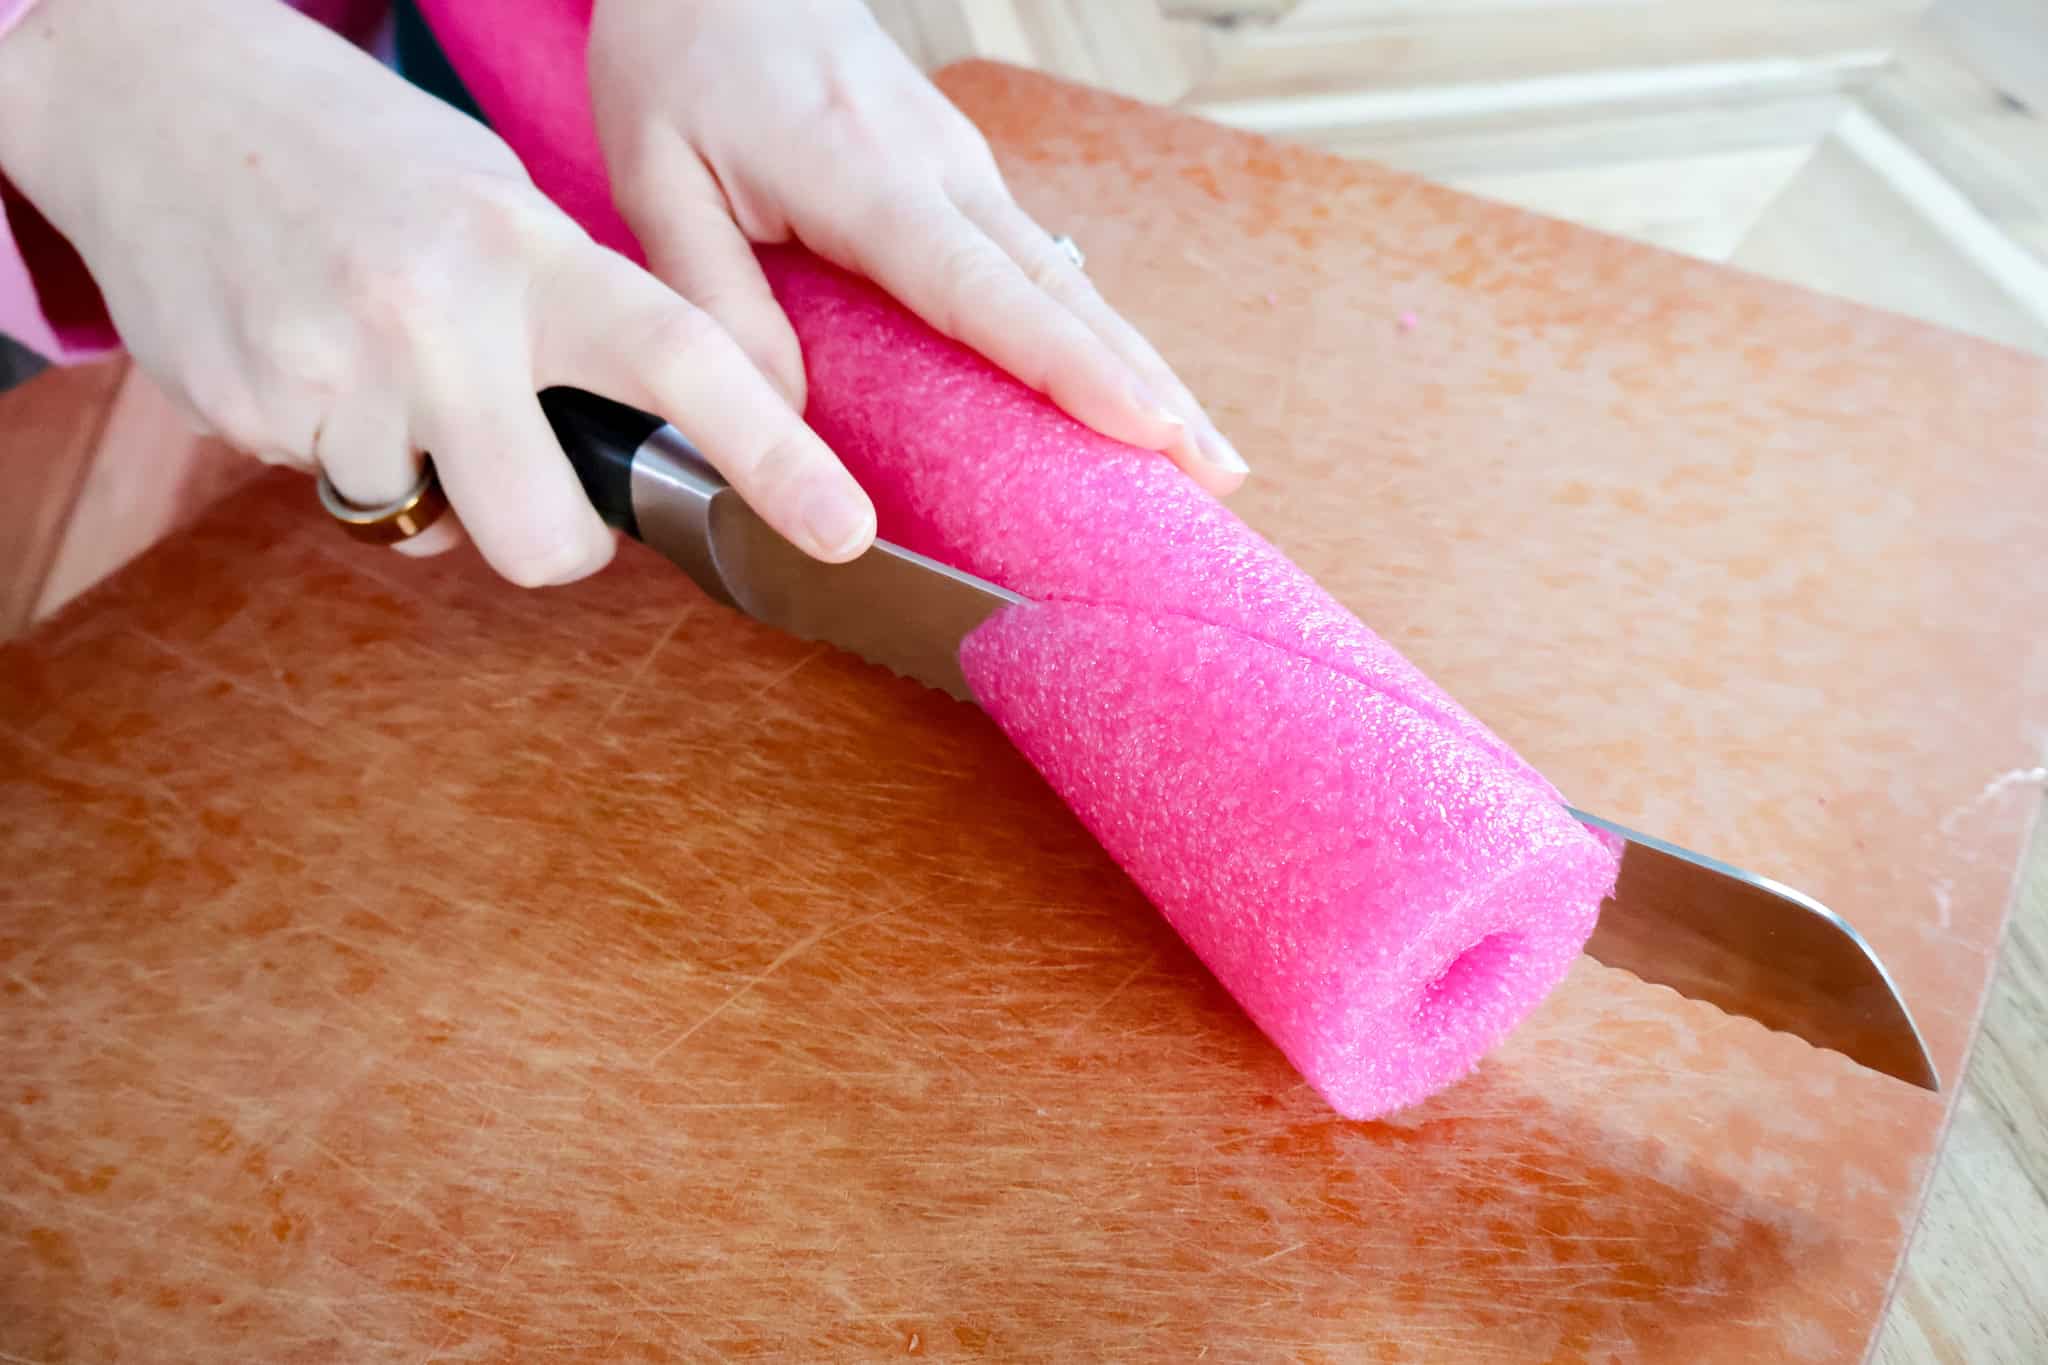
Start at the bottom corner of one and go across the noodle a couple of inches up. The exact measurements don't matter as much as you want the two noodle cuts to be about the same size so they will lineup when pressed together.
Do this on both noodles just one end of each for now.
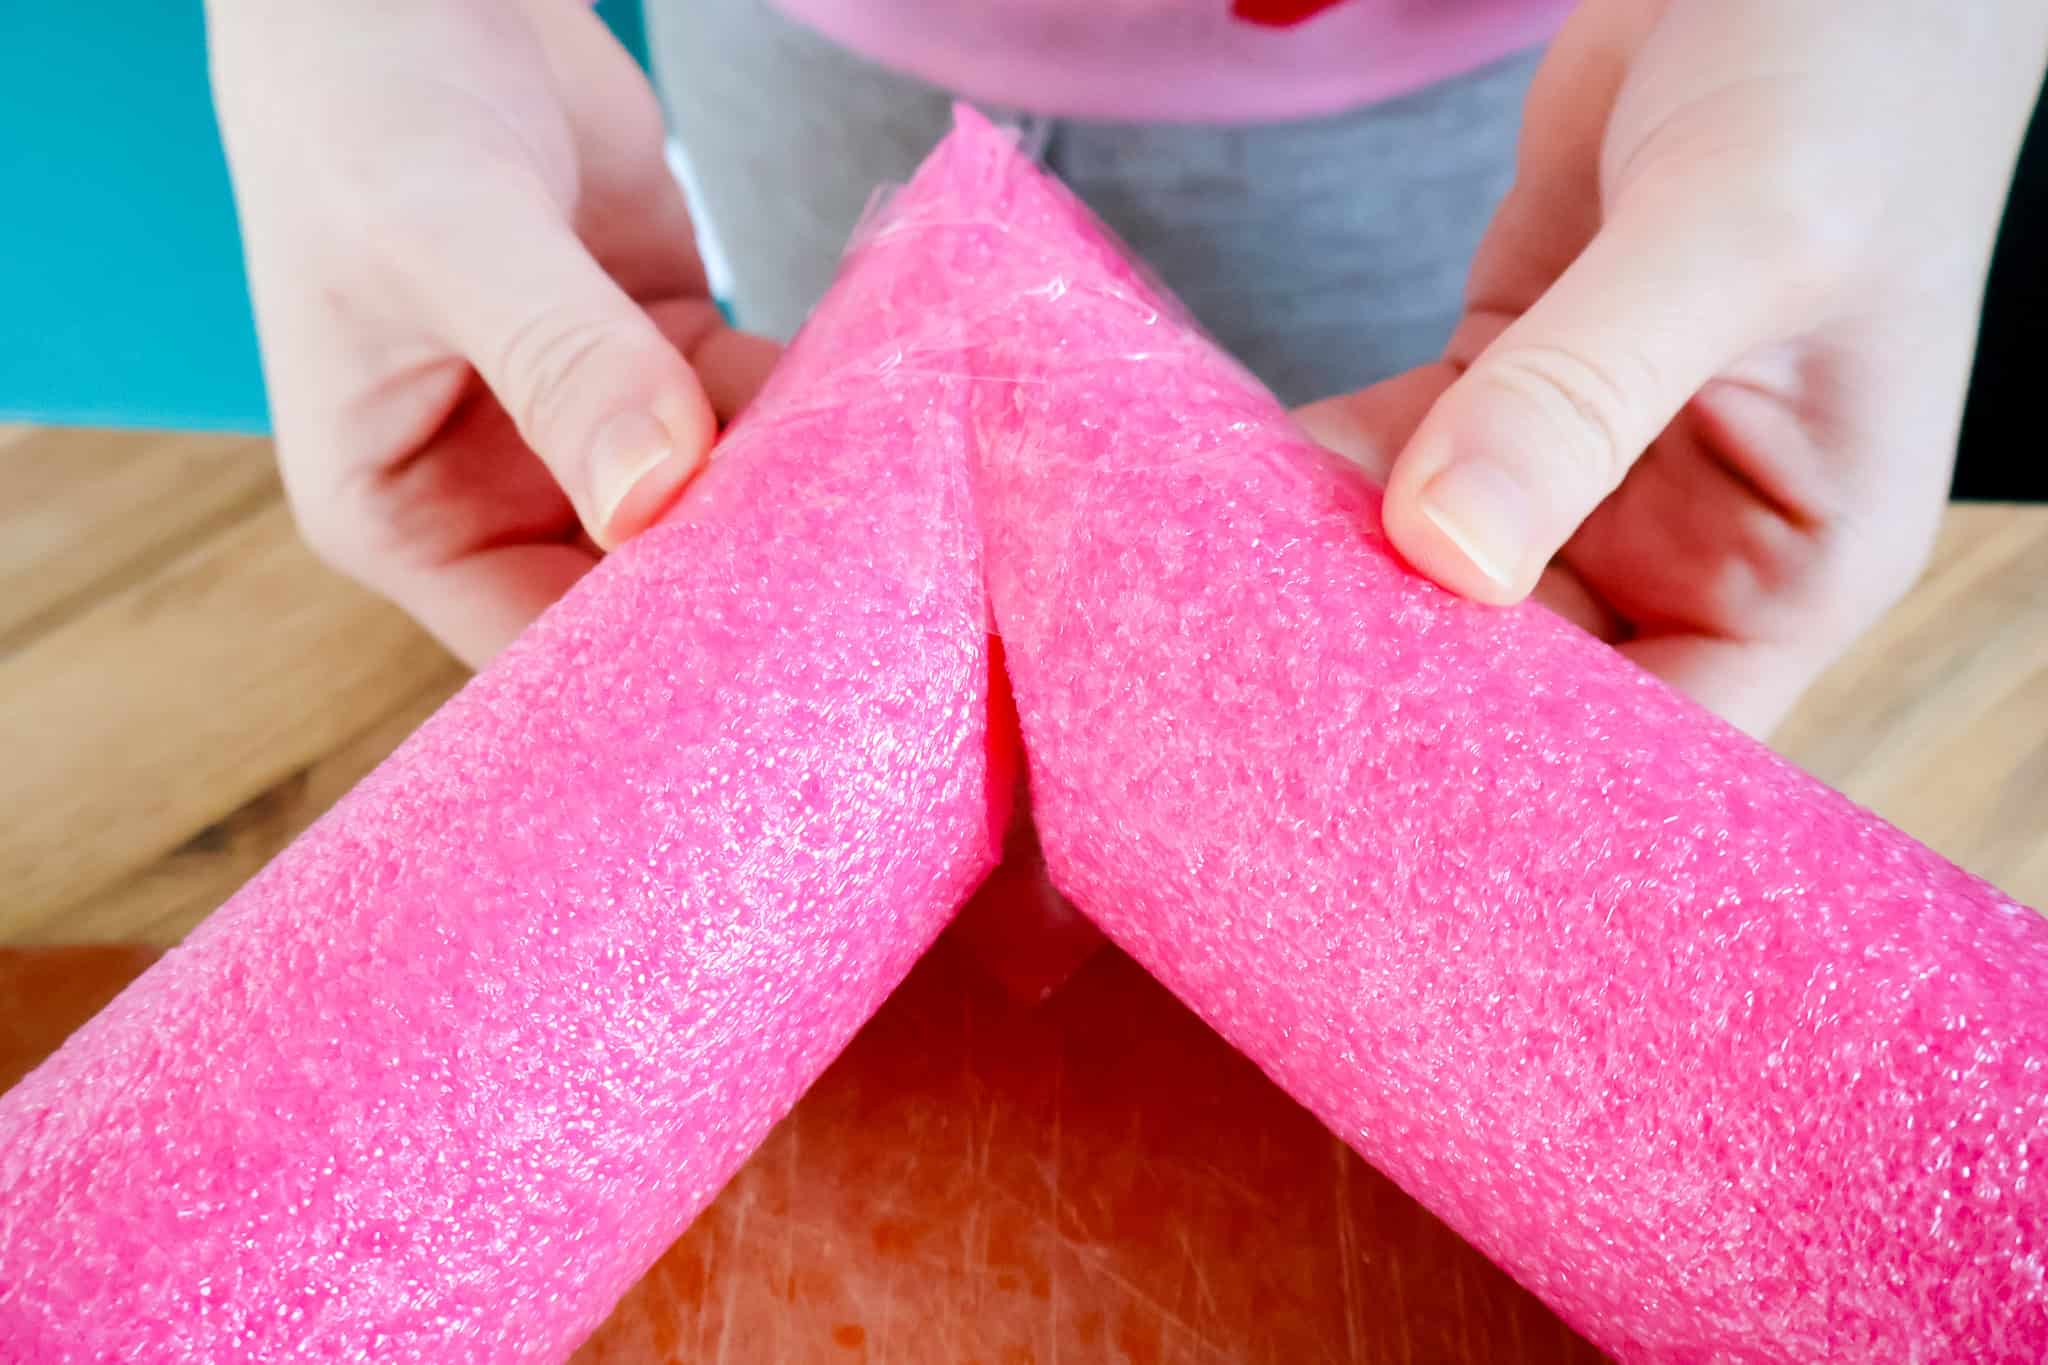
STEP 2: Connect the noodles
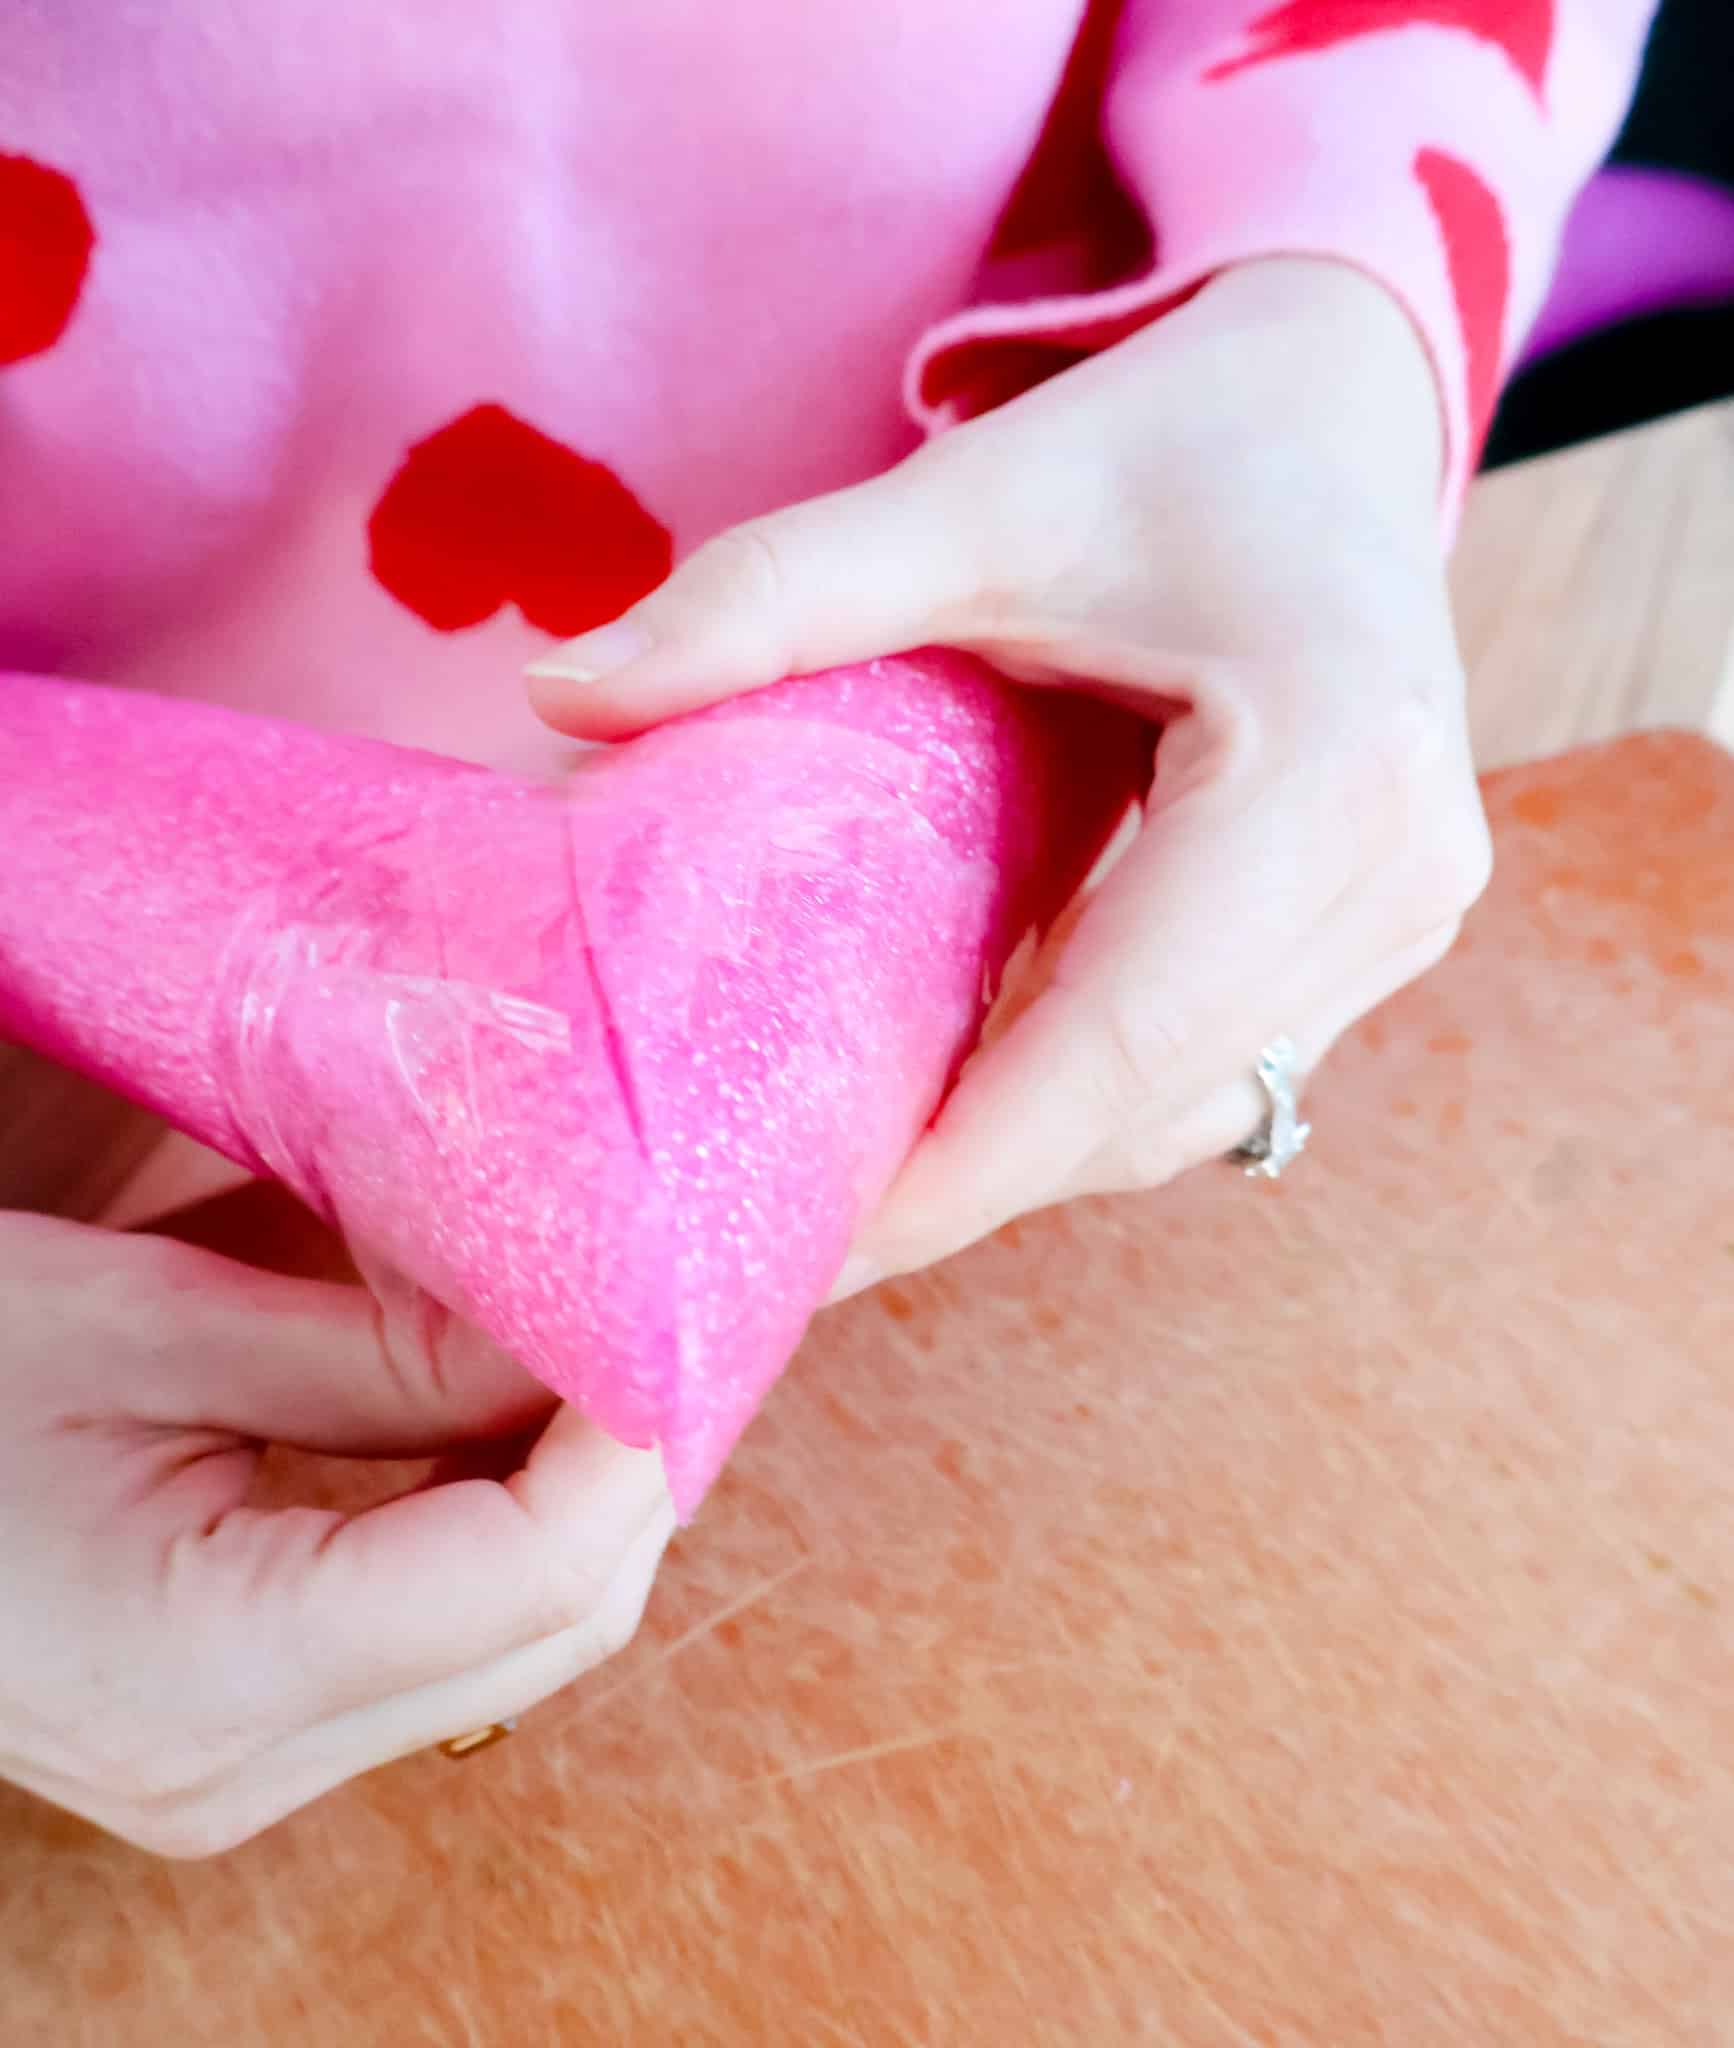
Now you are going to connect the two noodles at the spot where you just cut the 45° cuts. This is going to form the top sort of innie part of your heart.
I like to start by prepping my tape. Cut two pieces of clear packing tape about 8 inches long each. Stick them to the side of your table or work surface so they are ready to go.
Align the two cut edges of the pool noodles together, at the 45 degree cut. Wrap with the packing tape round and round until it feels secure.
It could be that this packing tape would be enough to hold your heart together. I planned to put mine outdoors in the elements so I wanted to be sure it was super secure. So, I decided to add zip ties as well.
The way I did this seems kind of wild, but it was simple once I figured it out and worked easily.
You are going to want to stab the zip tie through your pool noodle to hold it together. Since the zip ties themselves are not sturdy enough to stab through the noodle, you will need something that is. I used a simple number two pencil.
I used clear scotch tape to attach a zip tie to a pencil, and then stabbed that through the pool noodle just passed where my clear packing tape ended. Push it through both noodles so it comes out the other end then pull out the pencil and leave the zip tie only in the hole you just pierced.
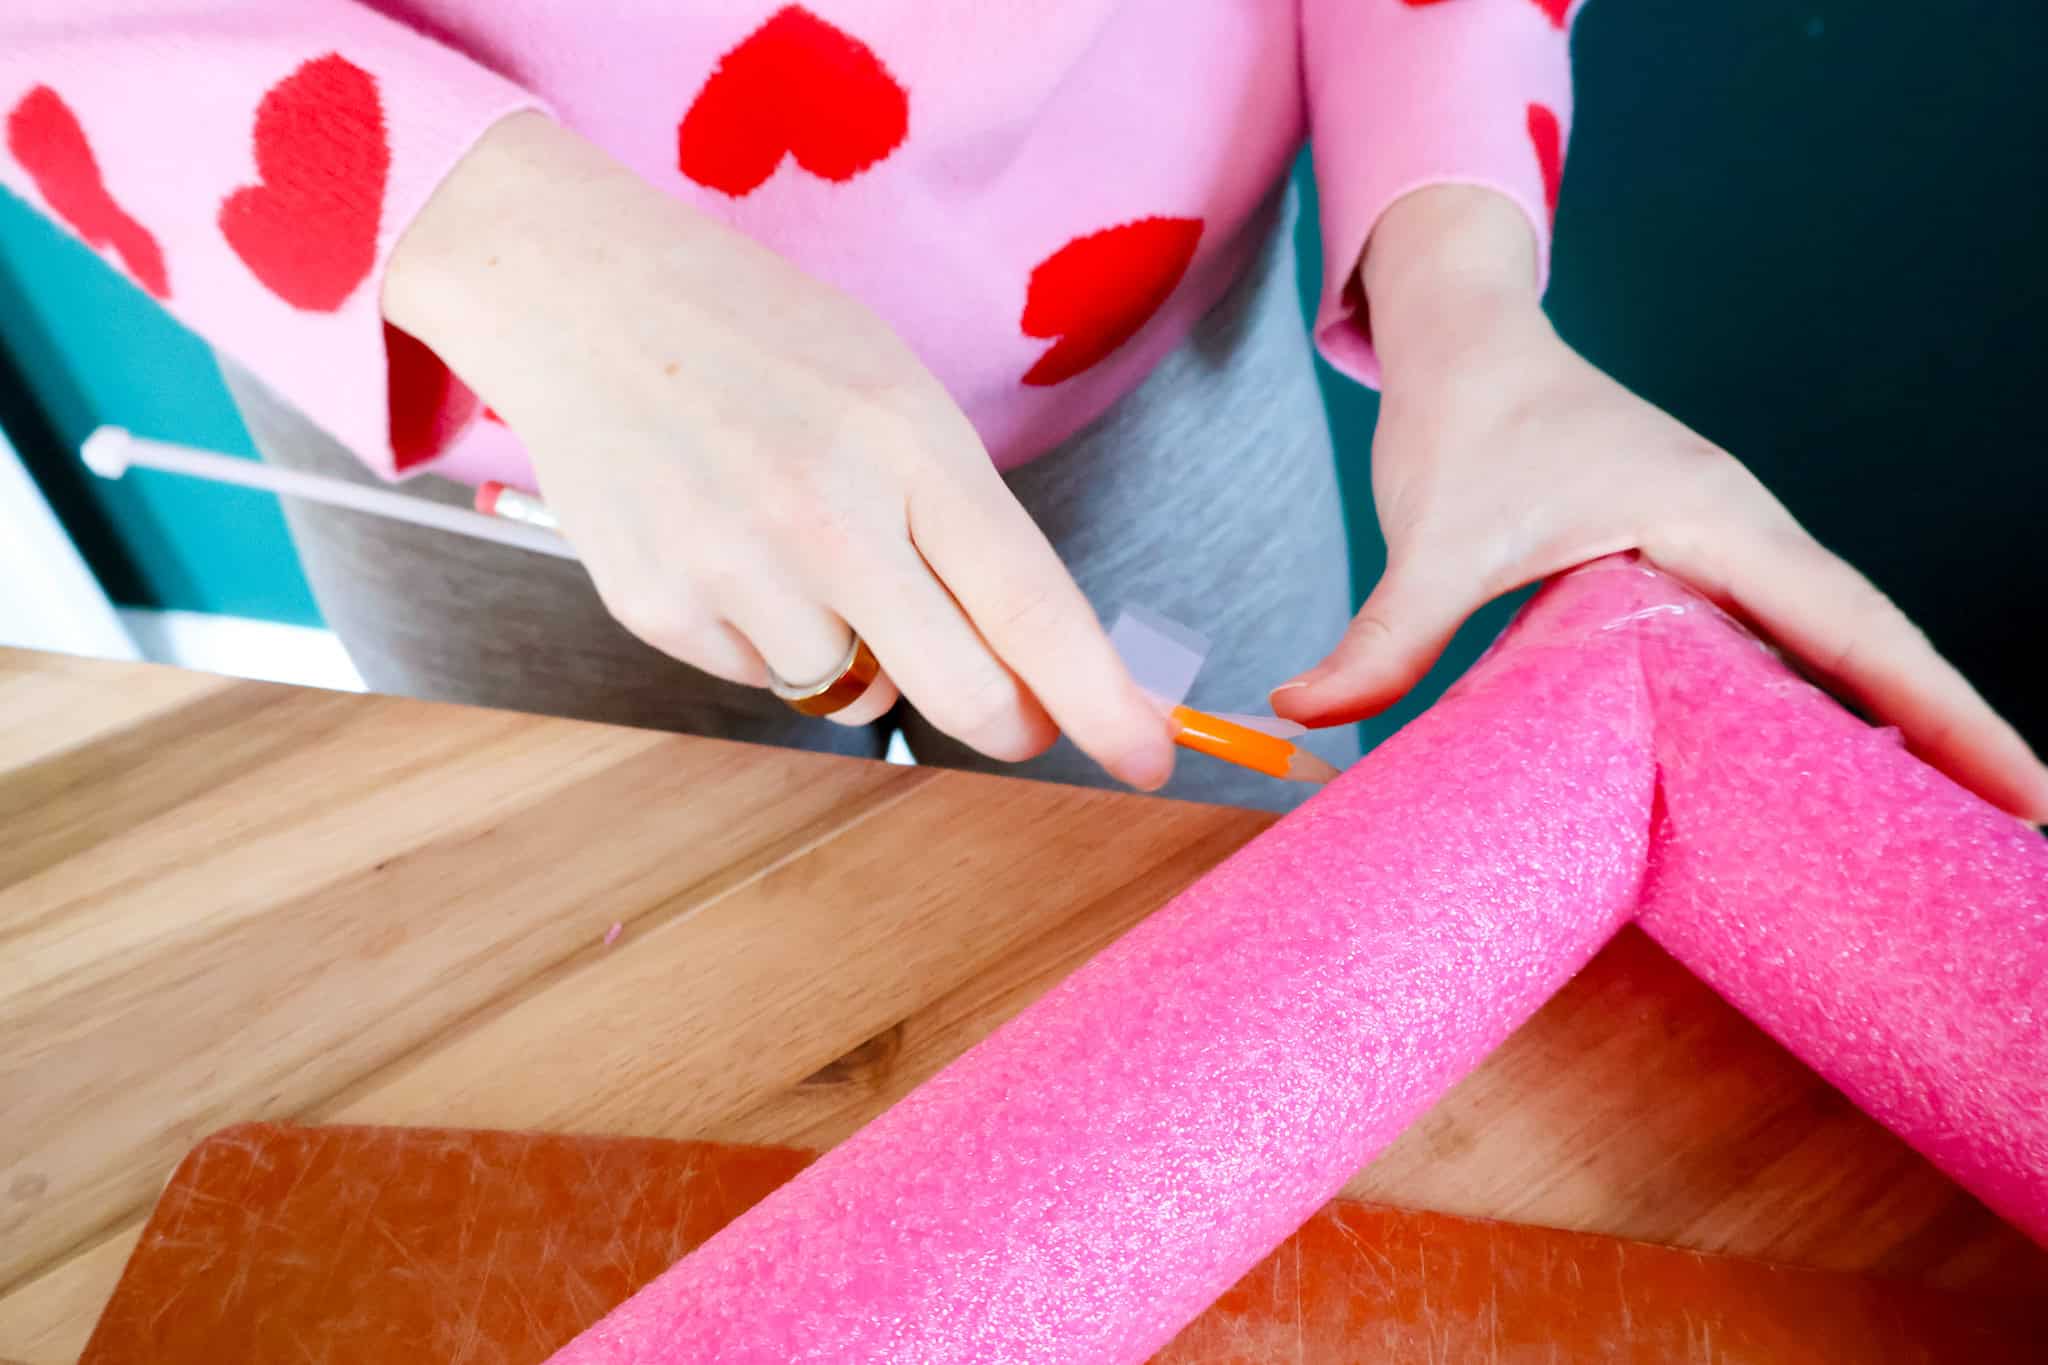
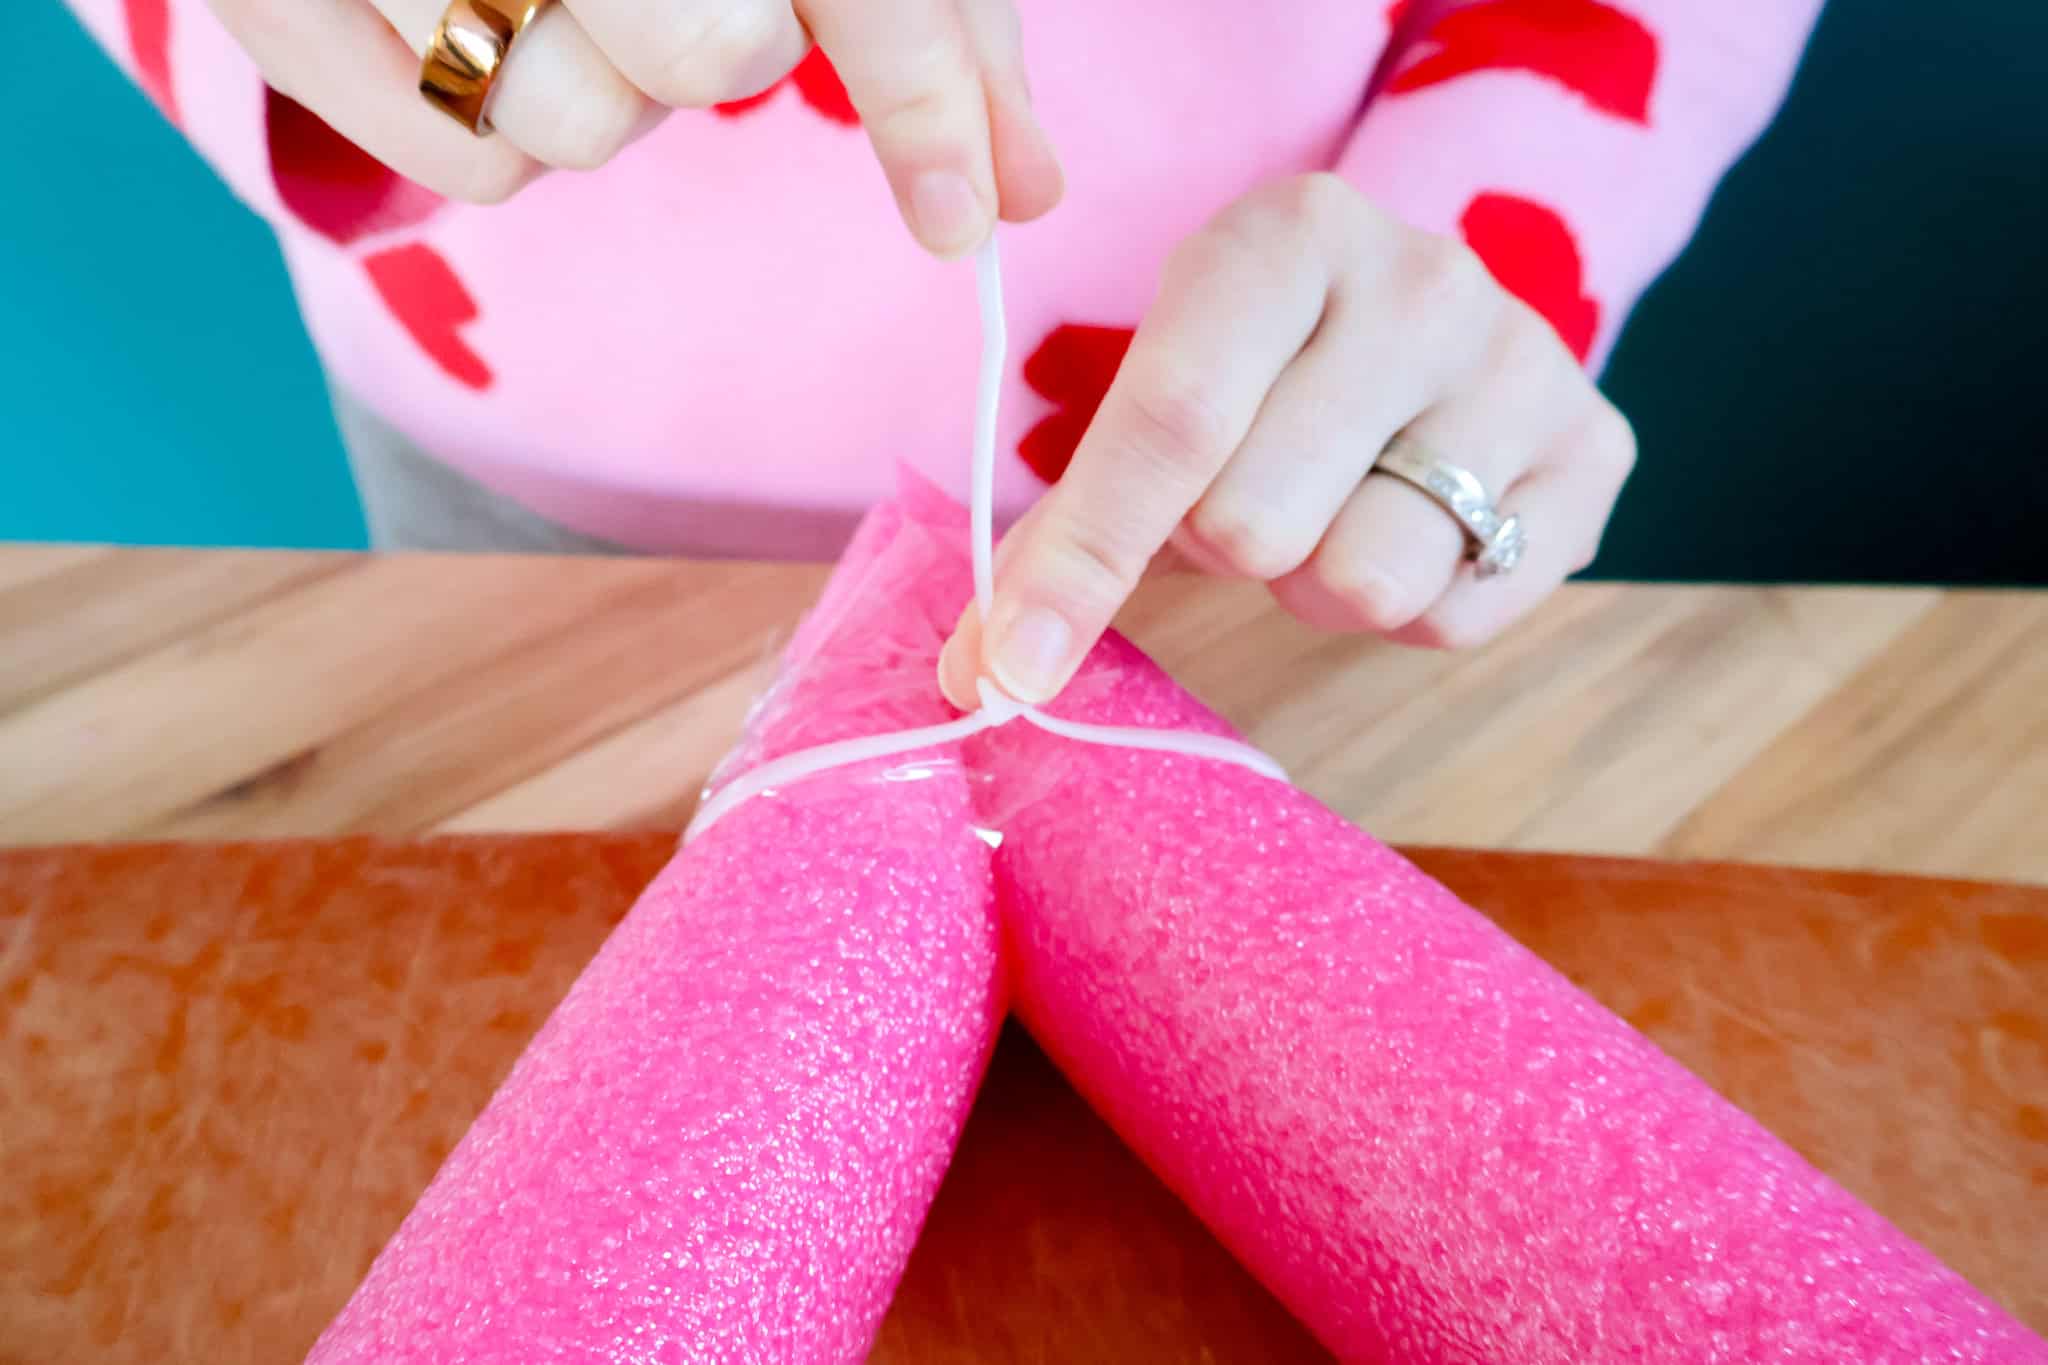
Then, close the zip tie and trim the excess.
Now you have the top of your heart!
If this sounds confusing, I encourage you to watch my video below. It's a little bit hard to put into words, but it's straightforward when you see it.
STEP 3: Repeat for the other end
Now we are going to repeat this exact same process to create the bottom point of your heart.
What kind of makes it difficult is that the pool noodles become a little bit cumbersome at this point. I suggest placing something heavy on the top section of the heart that you just completed the zip tie and taping on - I used a hand weight. You could also have a friend hold it in place for you if you have a friend around.
Now pull the two loose ends of your noodles around and down to meet in the center. Grab your knife and cutting board and you're going to once again cut a 45° angle on each of those loose ends.
Once again cut two 8 inch pieces of packing tape, hold your cut angle pool noodle ends together and tape together firmly.
Then you will once again use the pencil trick to pierce a zip tie through the noodles and pull it closed and tight. Trim the excess again.
STEP 4: Hold in Place
I originally anticipated this being the end of the tutorial, but when I got to this point, I realized that the heart wasn't really holding it's shaped like I wanted it to. So, more zip ties to the rescue!
Grab two zip ties. String one zip tie onto the other zip tie – just like 1 inch into the bumpy parts. It should be secure when you pull an opposite directions on the end and now you have basically a double long zip tie.
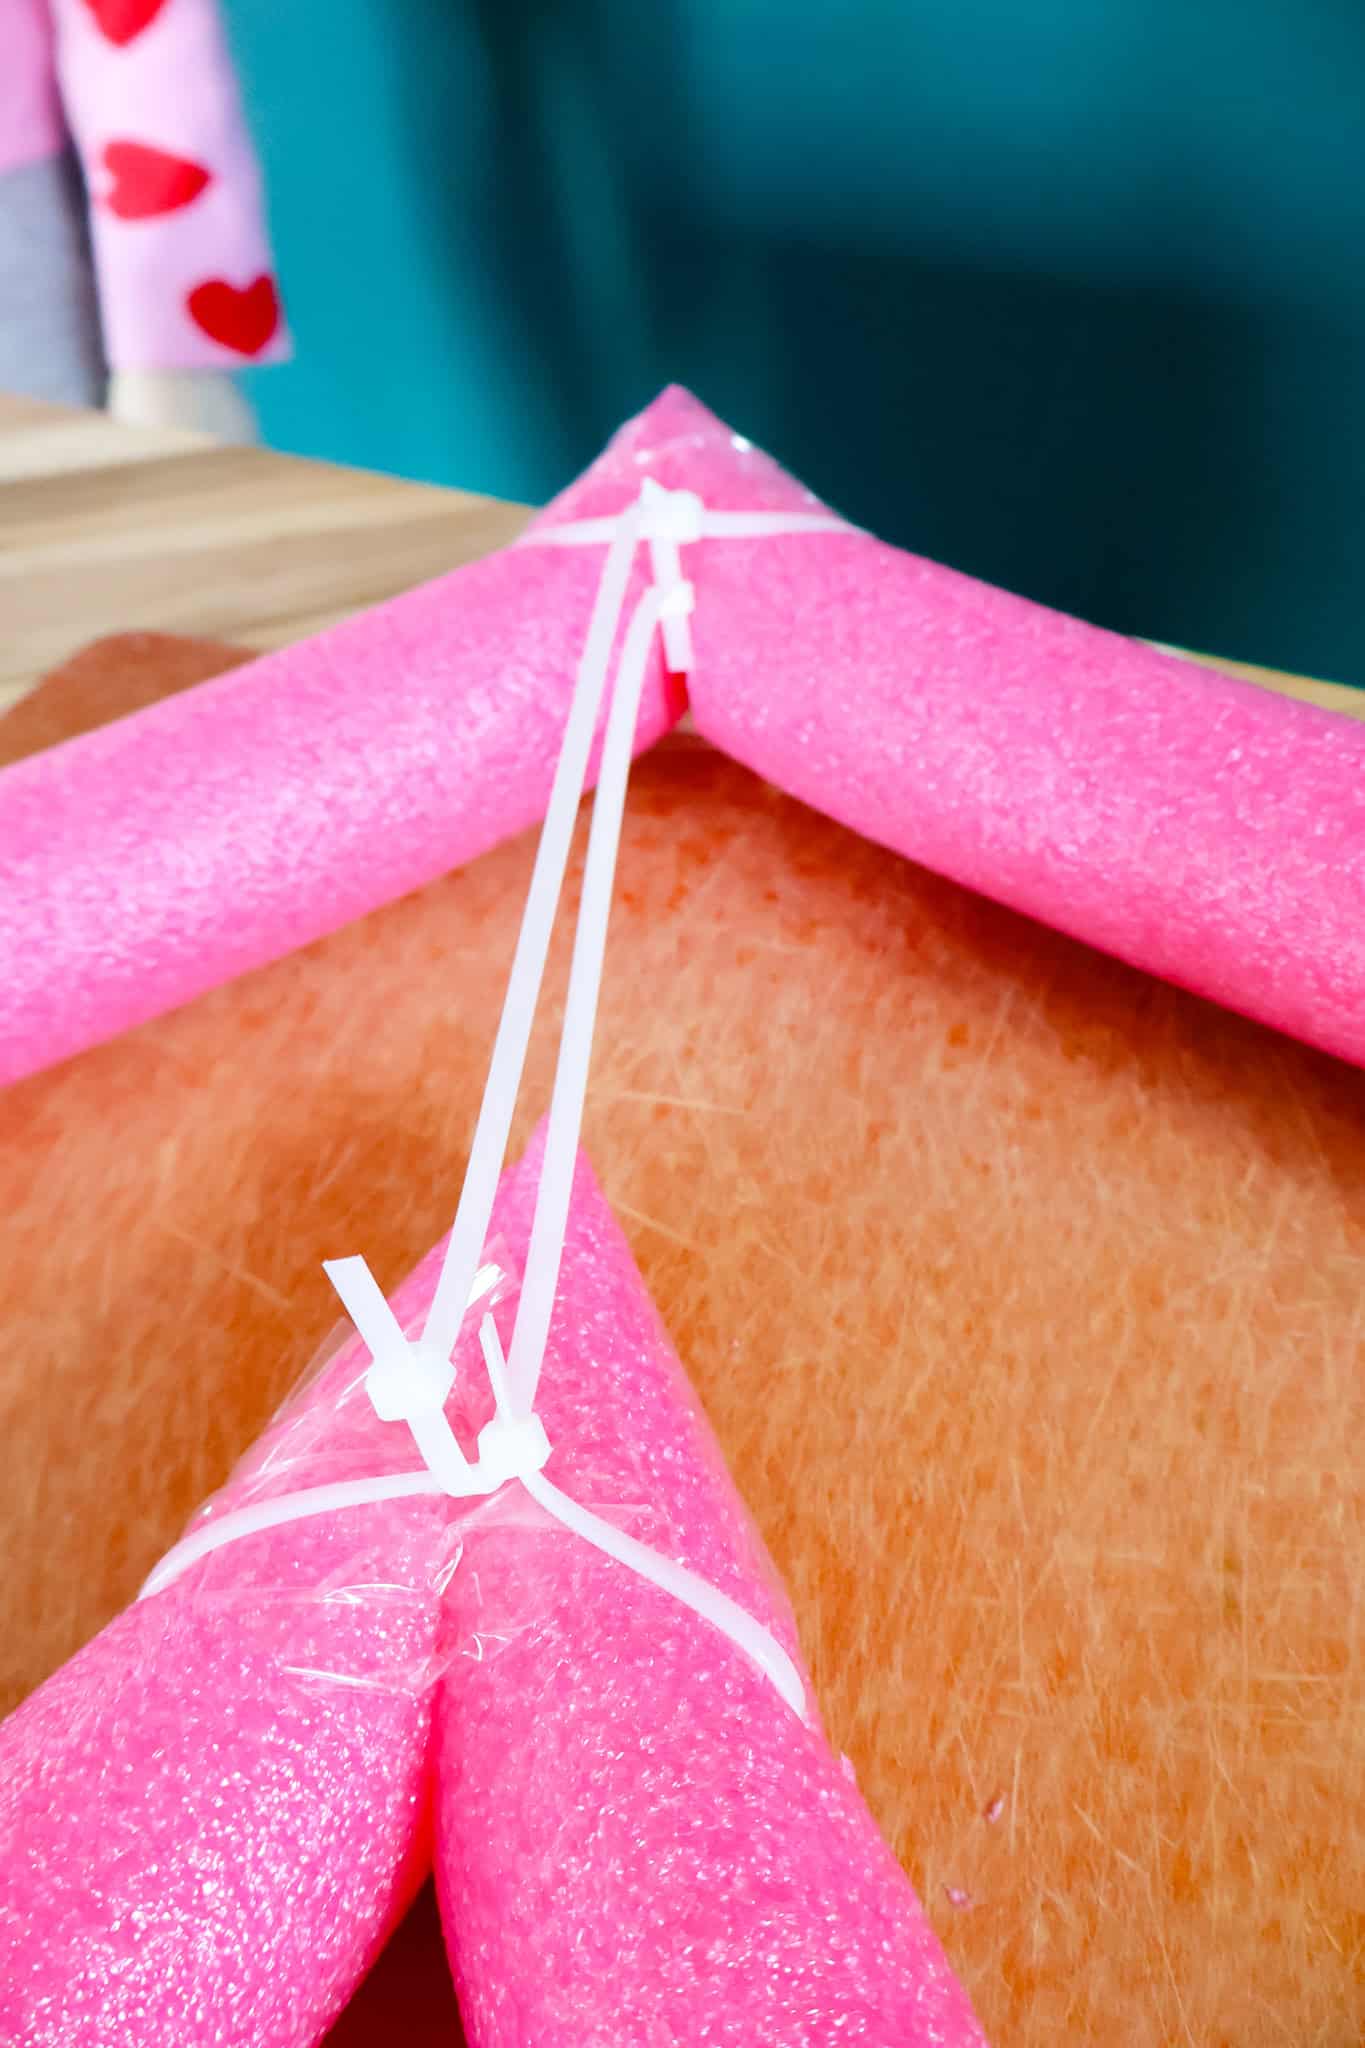
Run this through the zip tie loops you have put on the heart already at the top and one at the bottom.
Connect the other loose ends of the zip ties to create a loop and you will be holding the top any part of the heart to the bottom point in a way that will help it hold its shape.
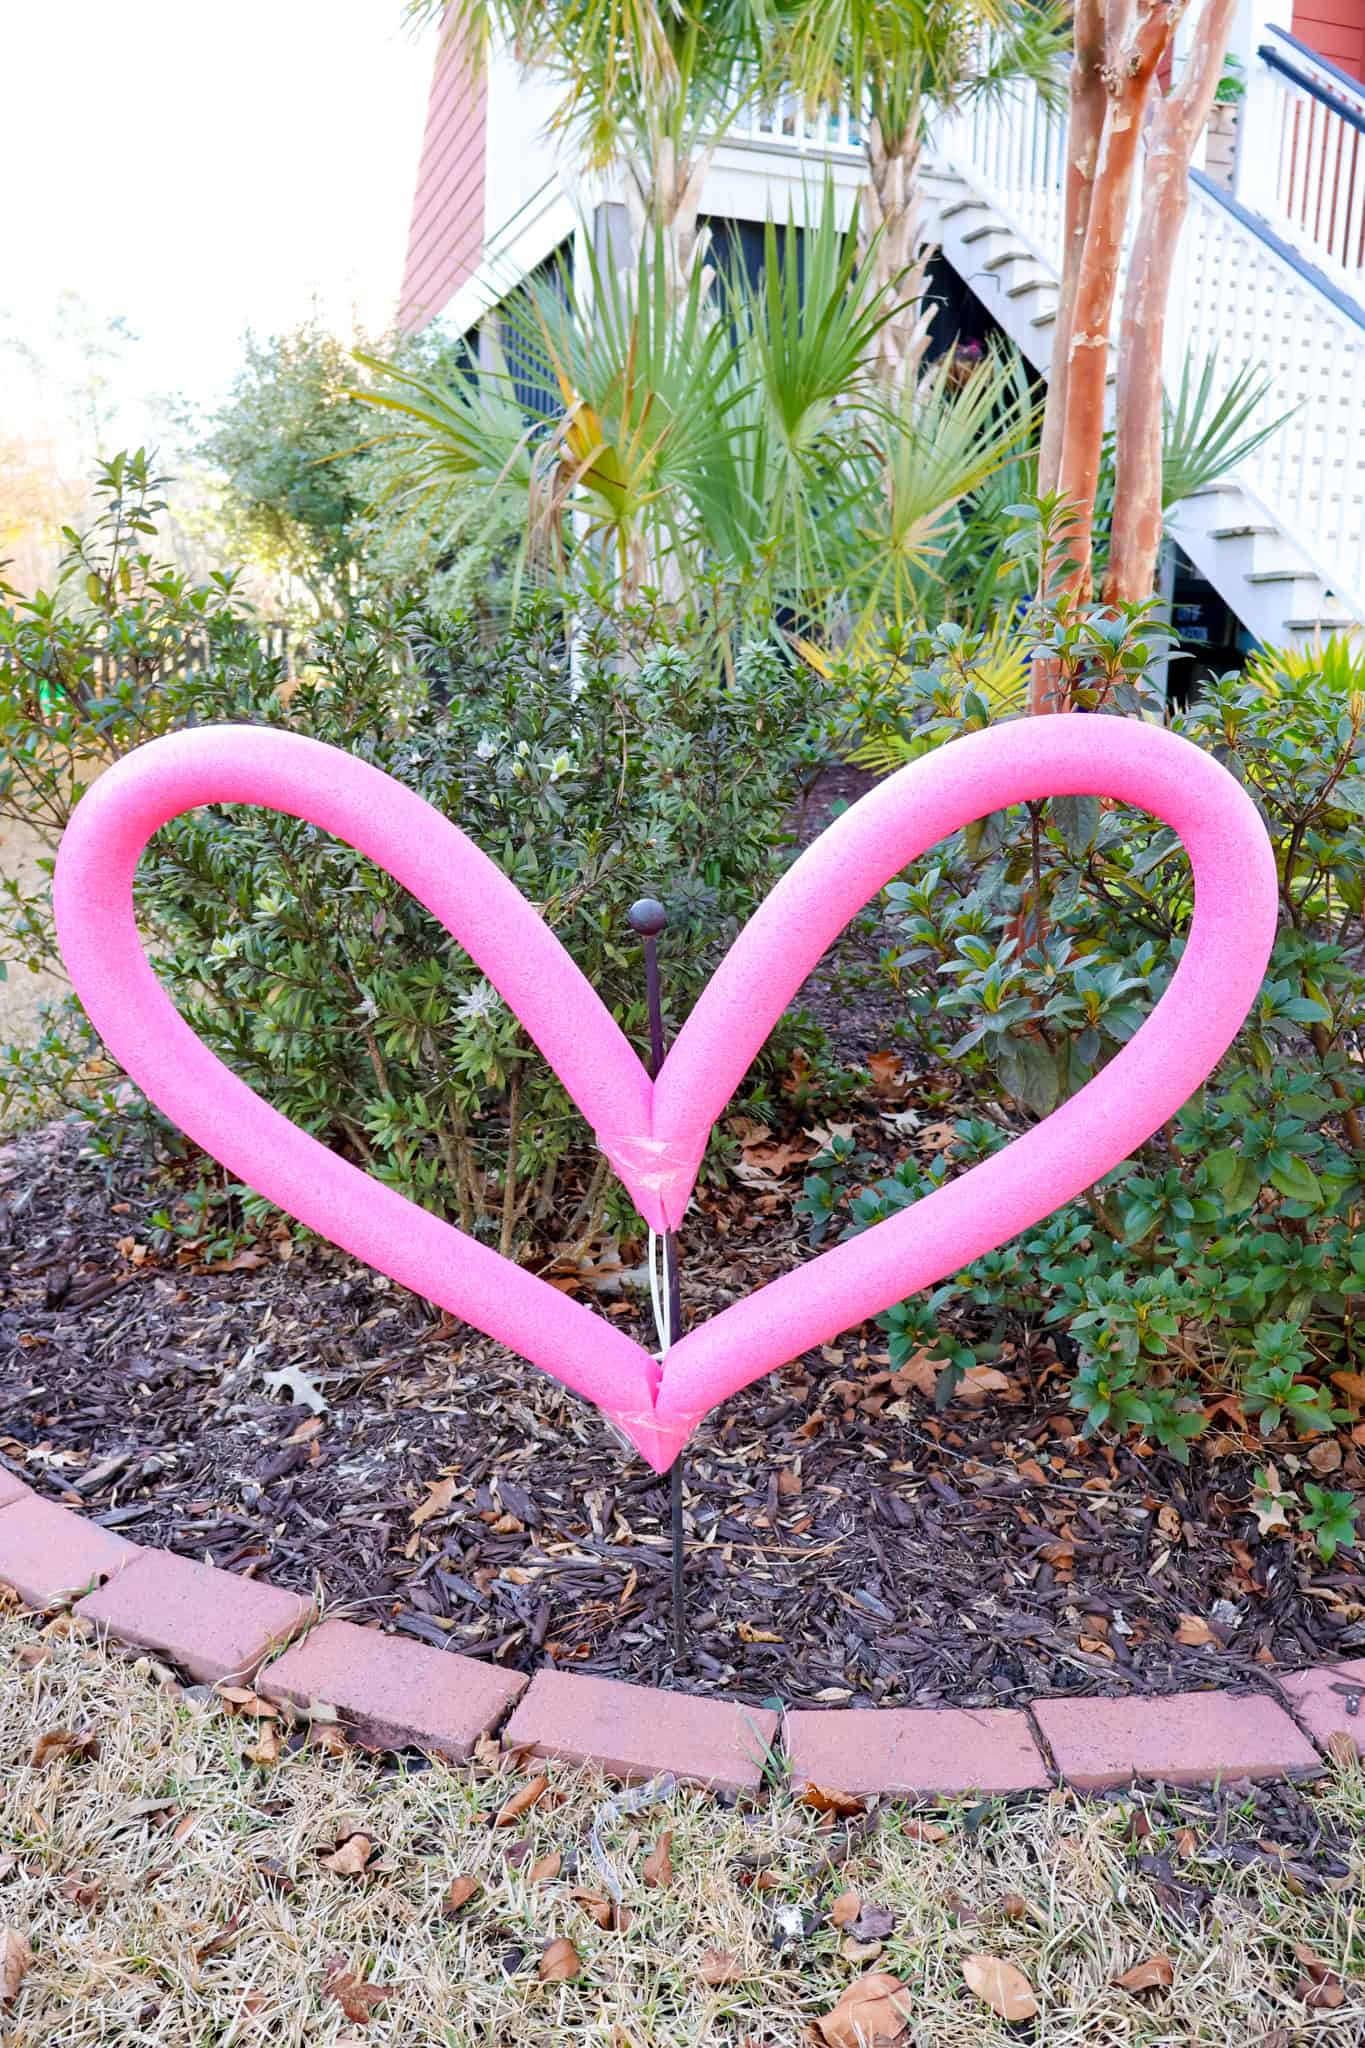
STEP 5: Mount or hang
Now your heart is complete! Repeat for as many hearts as you want. I bought my pool noodles and a 10 pack so I made five big hearts.
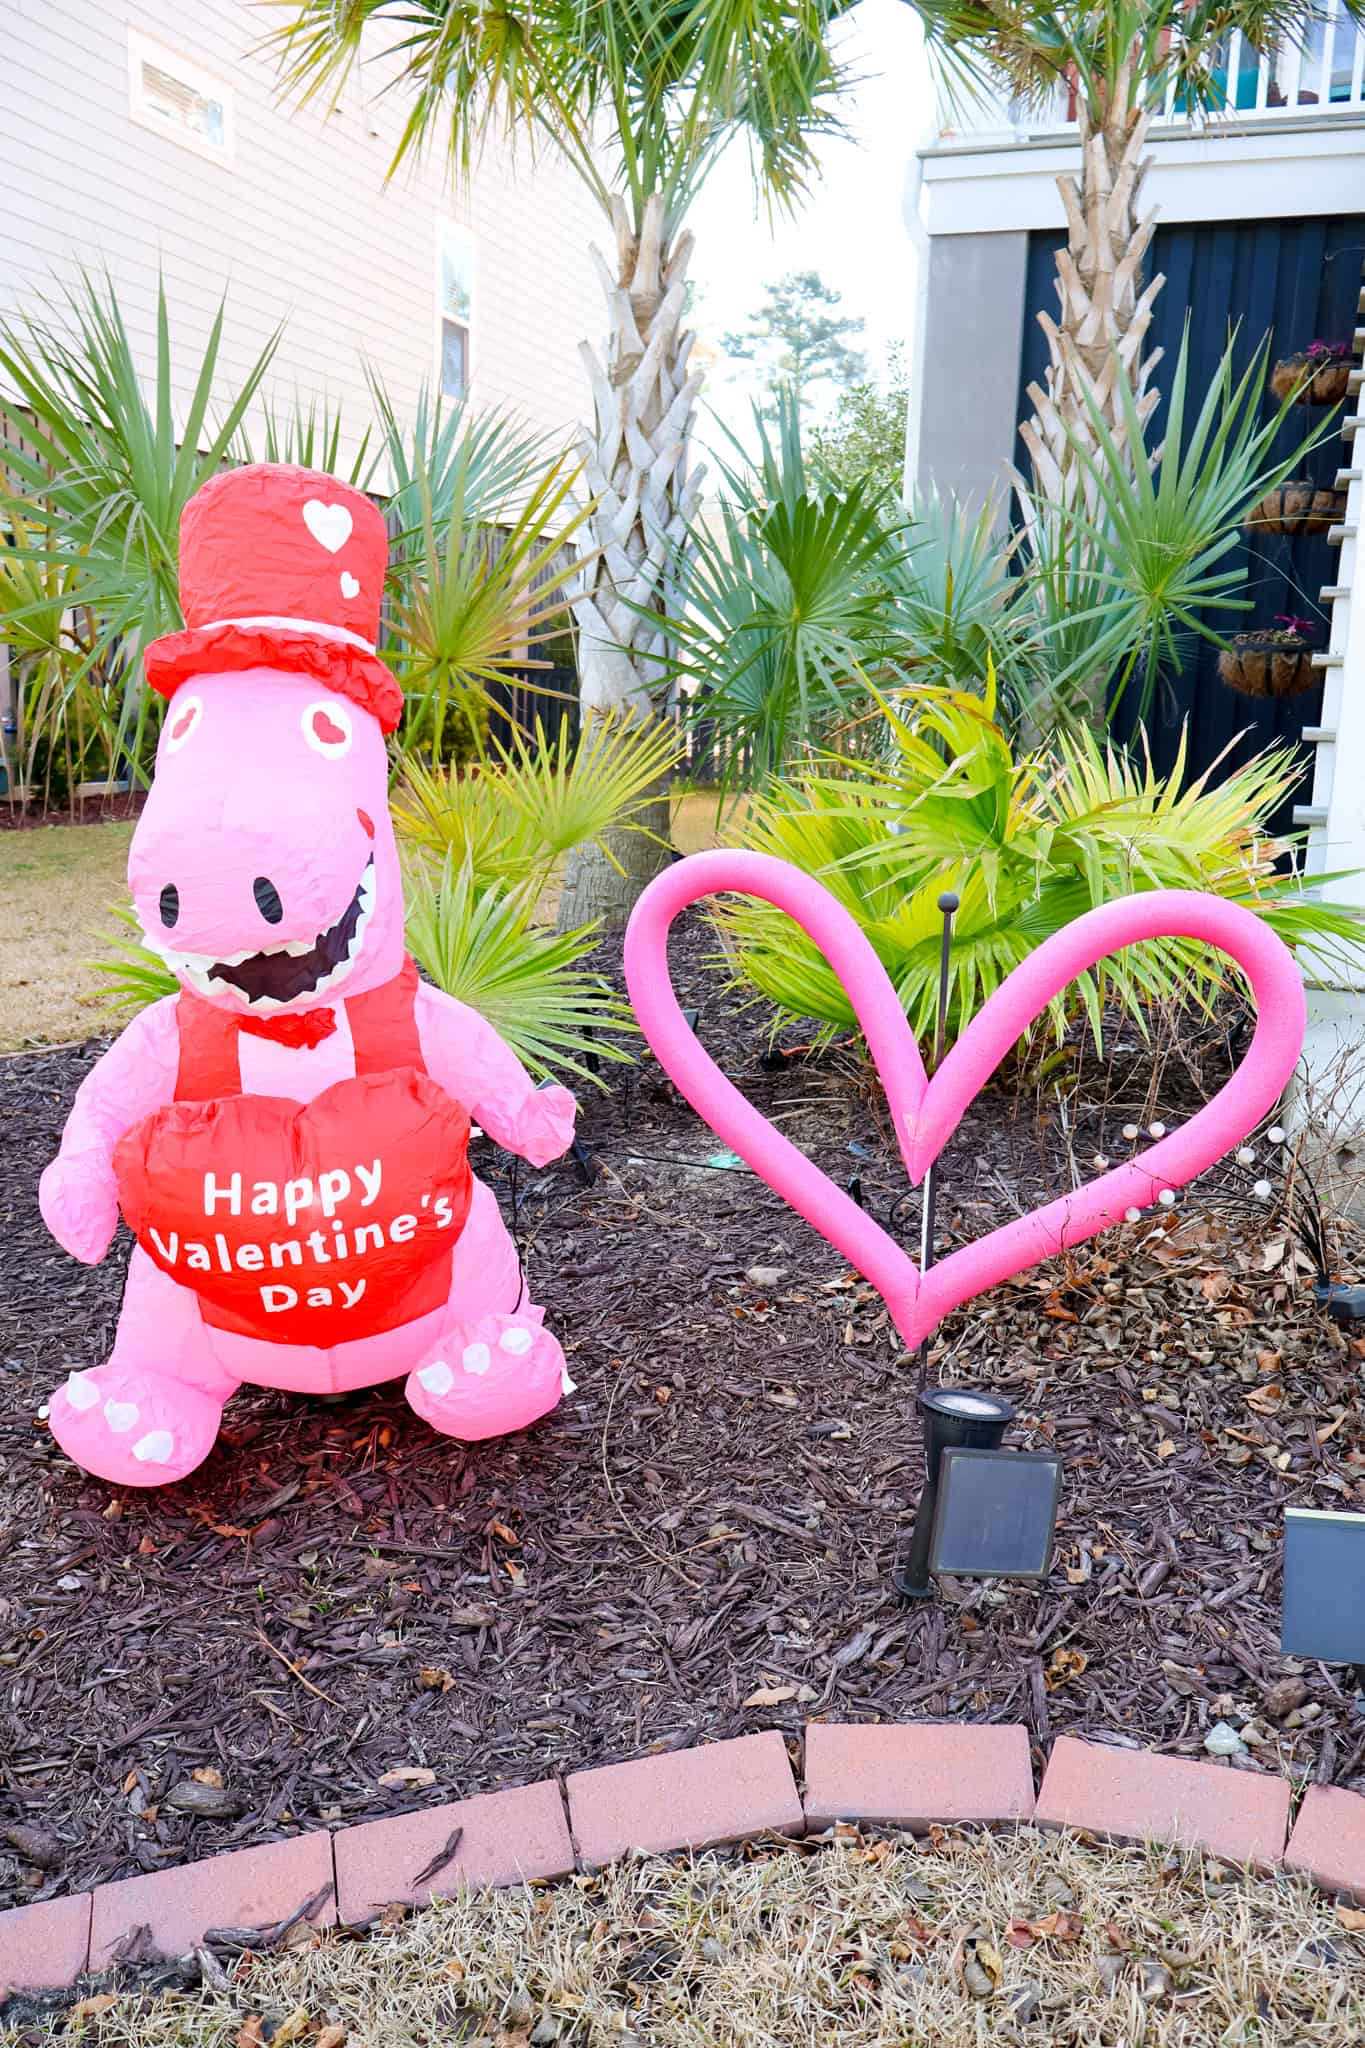
I decided to put our hearts in our front yard because I love decorating the yard for every little holiday.
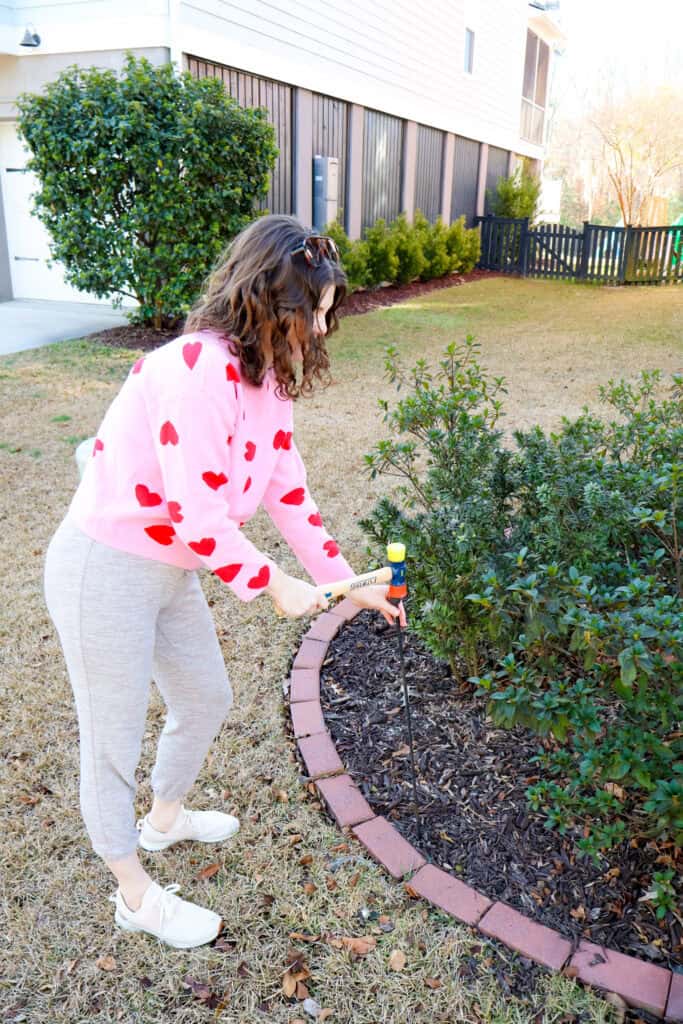
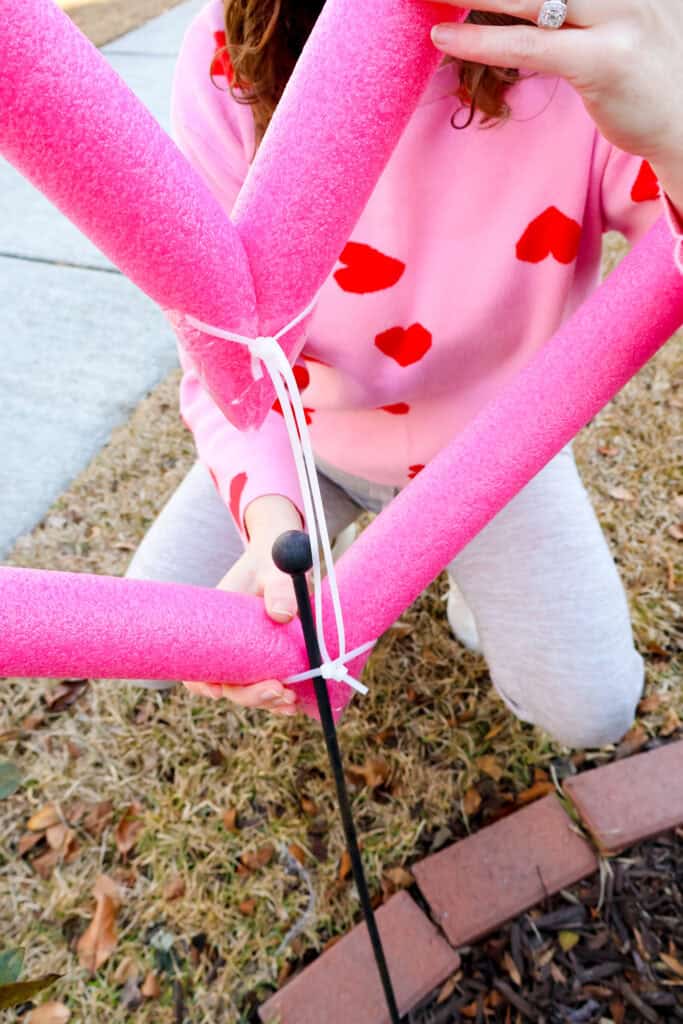
To mount them in the ground like I did you were going to want a piece of rebar or a long dowel or something similar. Use a mallet to hammer into the ground until it's sturdy. Then string the zip ties on the back of your heart onto the dowel. So cute!
You can also use twine to hang these such as from a tree or use yet again more zip ties to attach them to the front of a porch railing. So many possibilities!
I love how these turned out and how cute they are in our front yard! So fun and festive for Valentine's day, but they could also be fun for a bridal or baby shower!
Happy celebrating!
Thanks for reading!


Hey there, I'm Morgan, the creative mind behind CelebratingWithKids.com! As a parent of two lively little ones, I've made it my mission to turn ordinary days into extraordinary adventures, sharing playful activities, thoughtful toy reviews, and delightful printables to help families celebrate every moment together. 🎉👨👩👧👦🎈