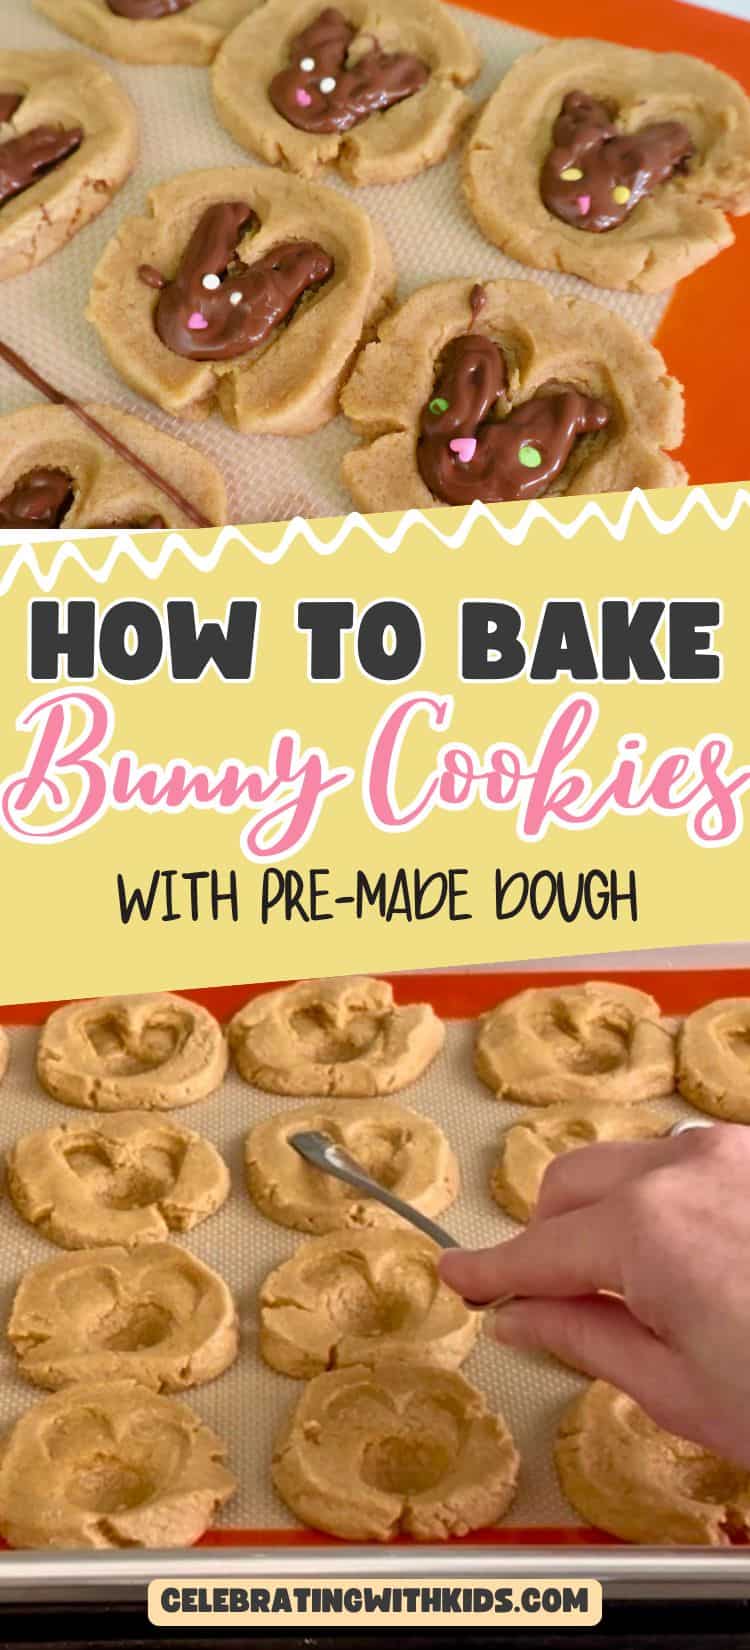
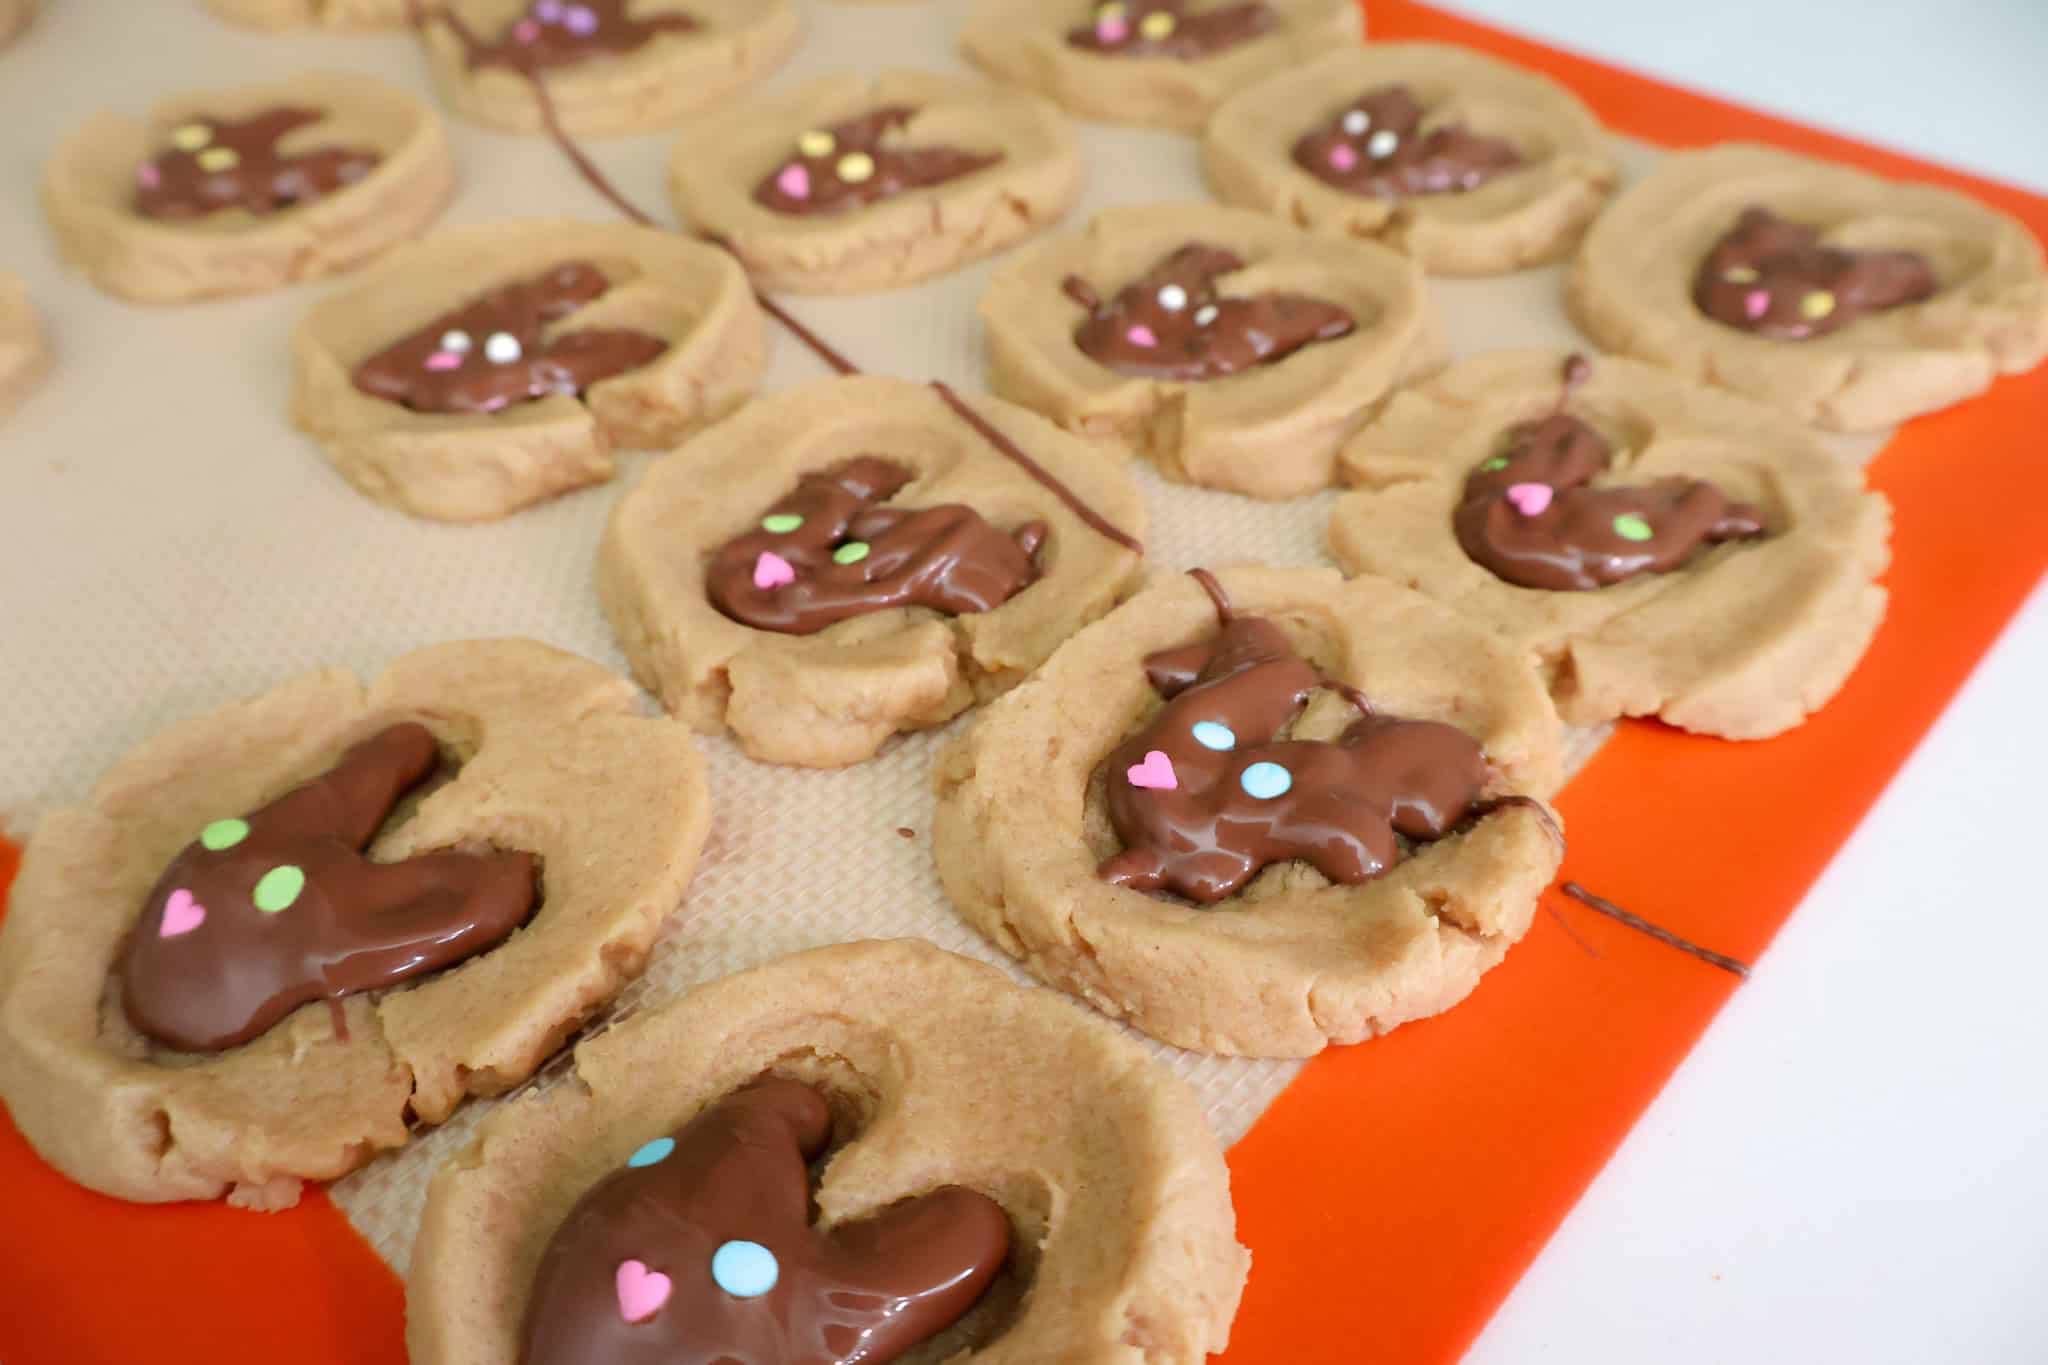
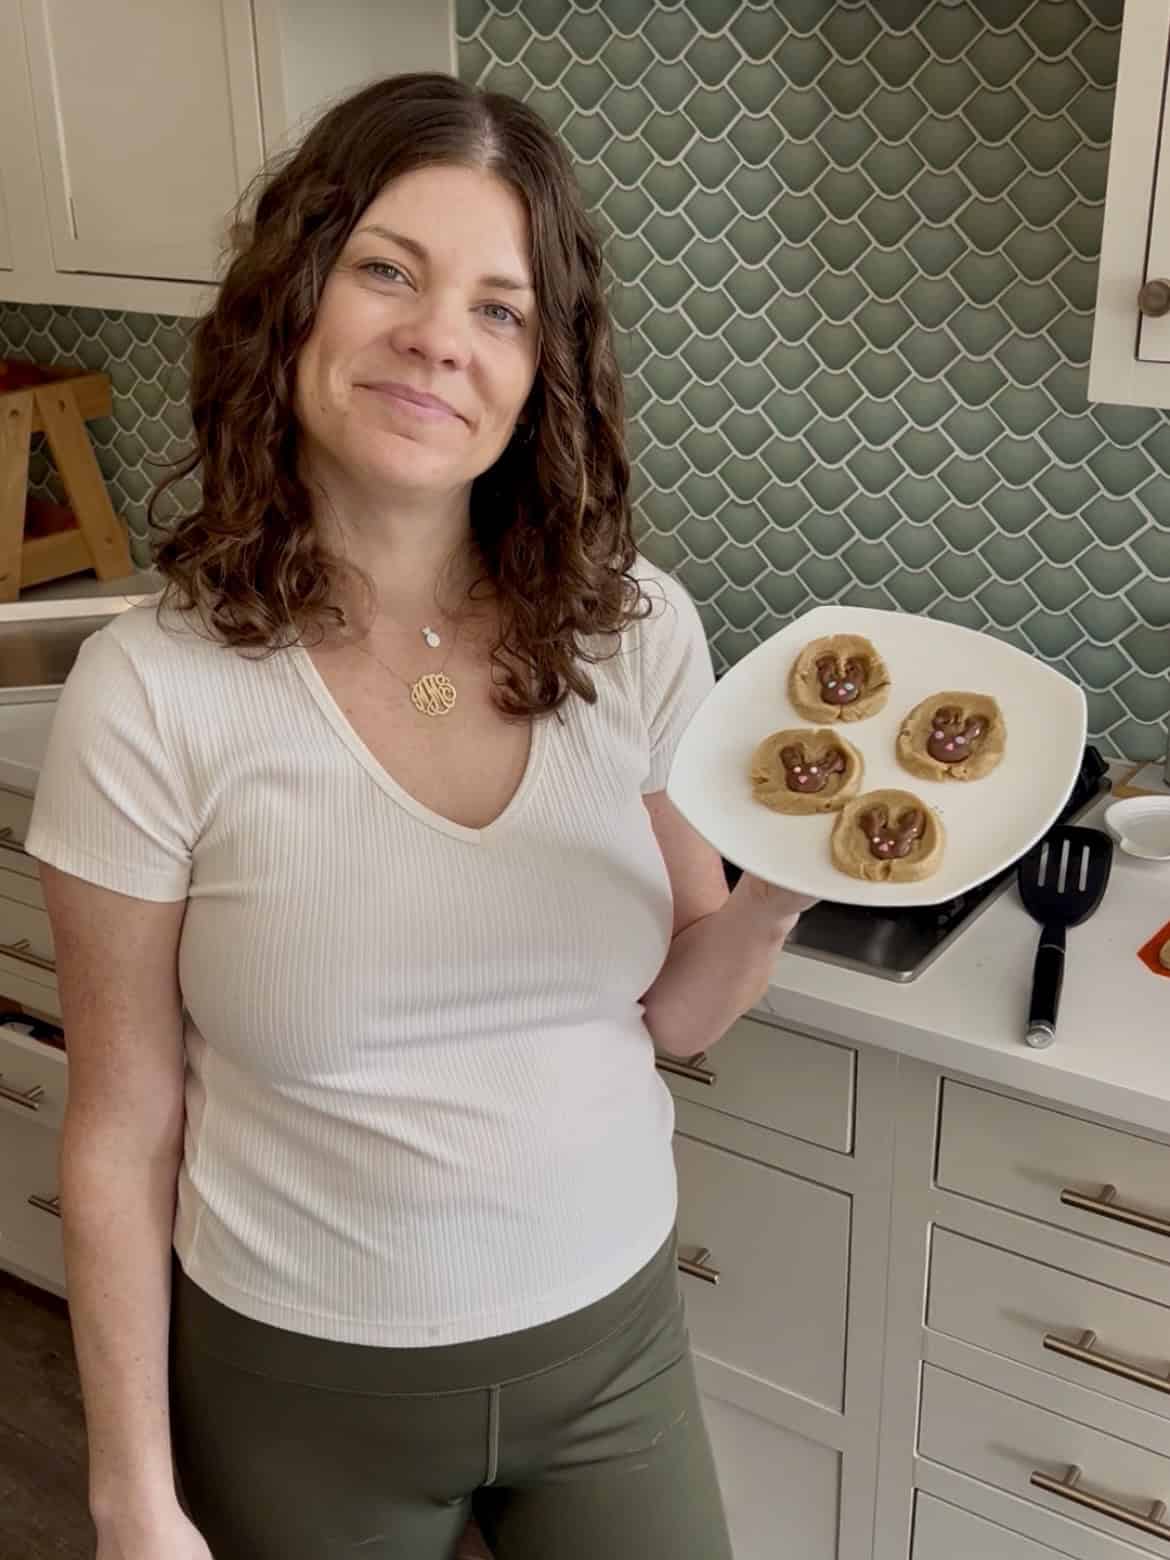
These bunny cookies are a cute and easy Easter treat made with ready-to-bake cookie dough and melted chocolate. They look adorable but are surprisingly simple to make with just a few ingredients.
If you’re looking for a cute Easter treat that’s easy enough to make with kids, these bunny cookies are perfect.
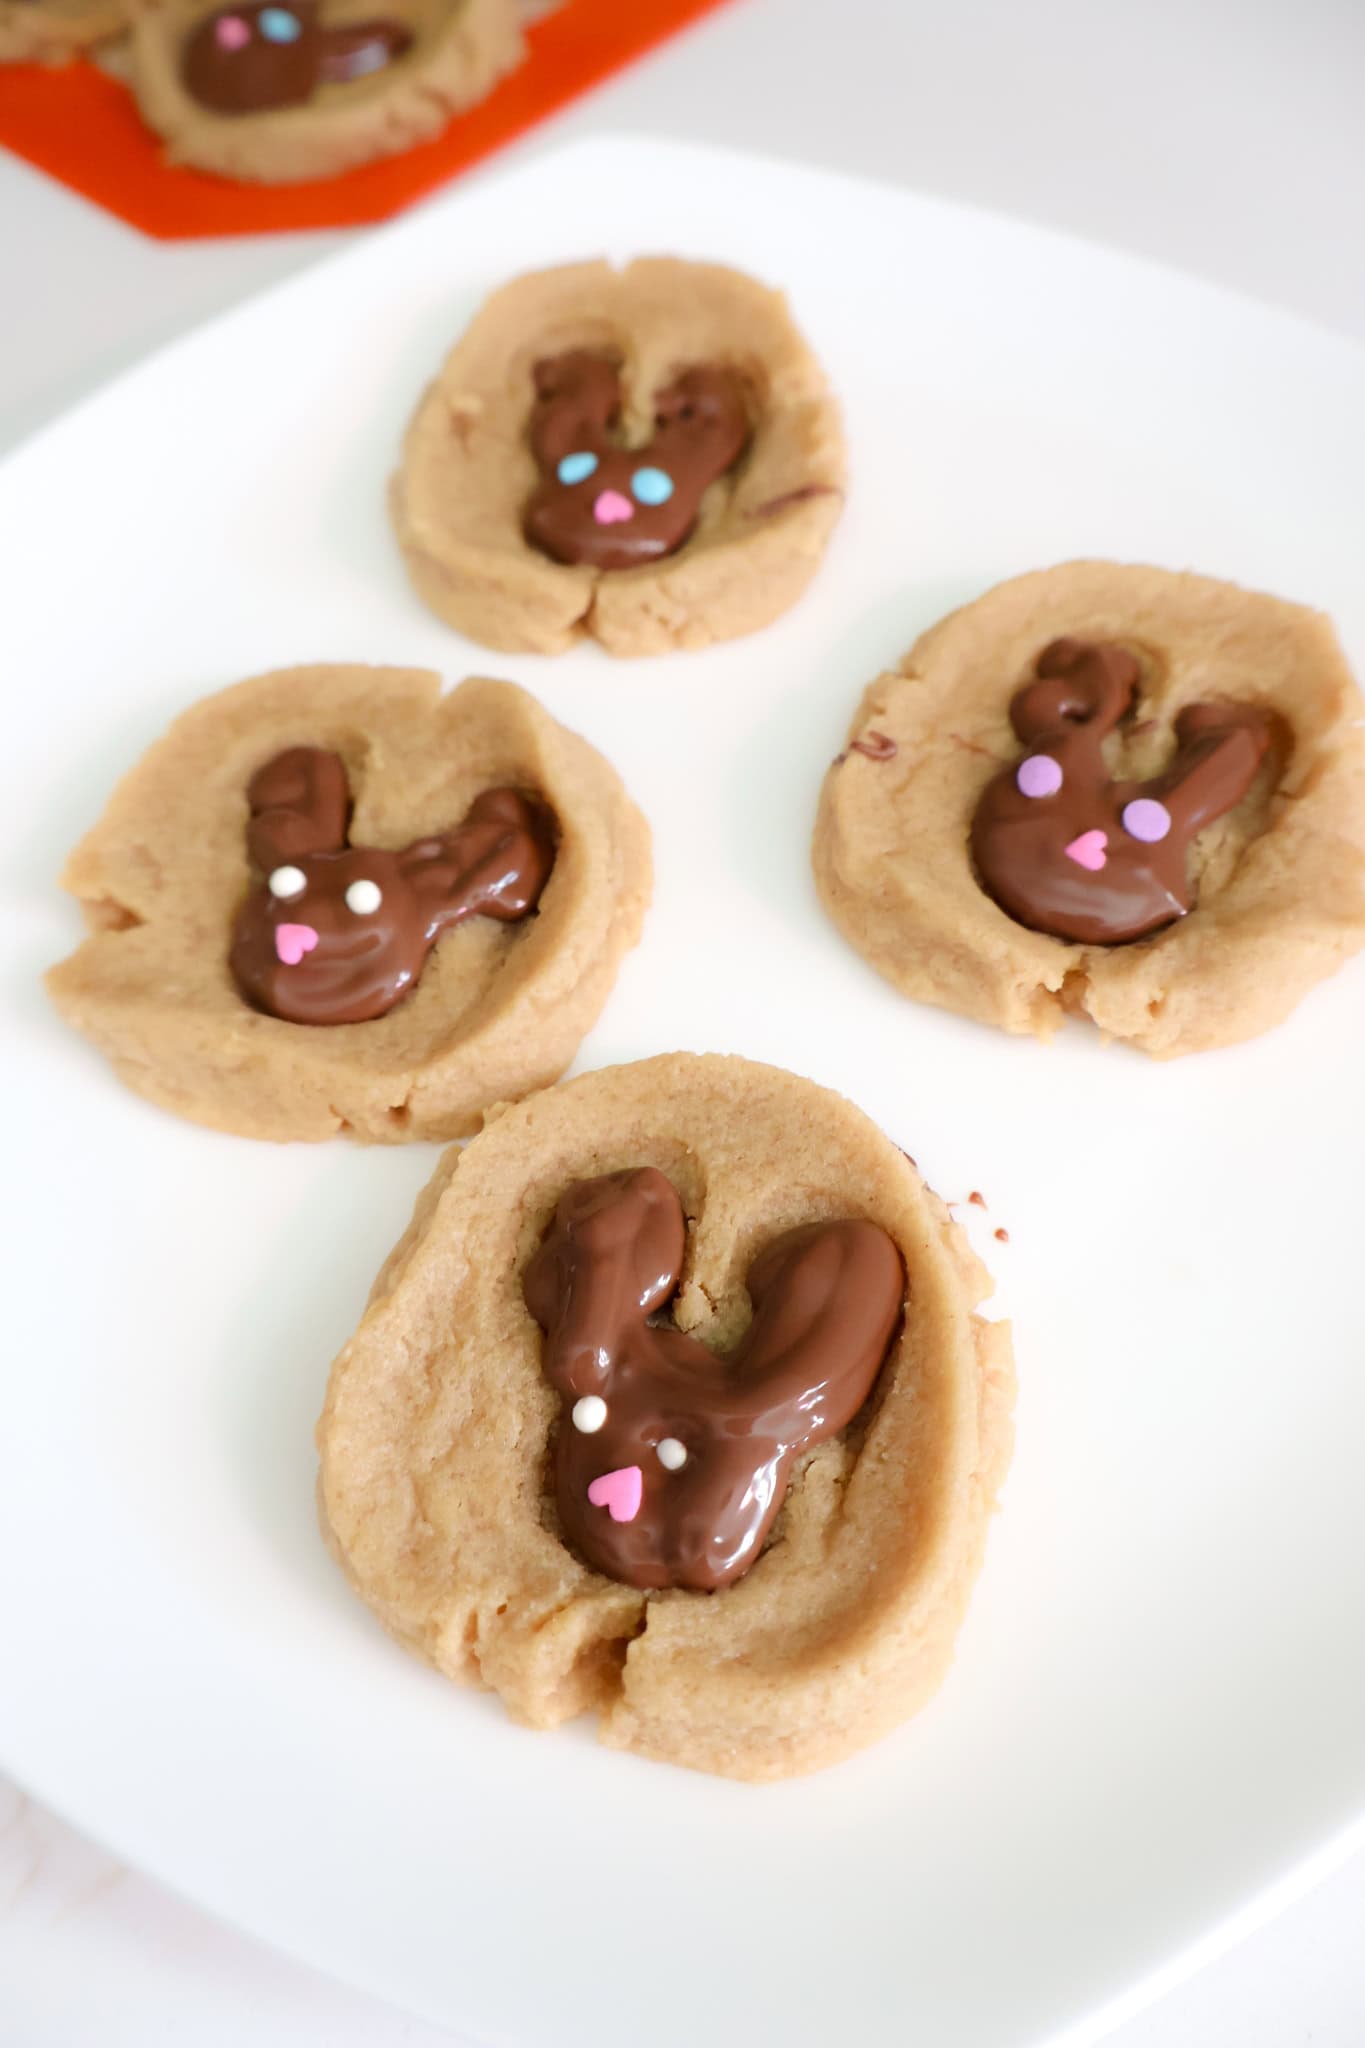
They start with ready-to-bake cookie dough, and a simple indenting trick turns them into adorable bunny faces. Then you fill the bunny shape with melted chocolate and add a few sprinkles for eyes and a nose.
The result is a cookie that looks impressive but is actually really simple to make — and the peanut butter and chocolate combo is absolutely delicious.
These are perfect for Easter dessert trays, spring parties, or just a fun afternoon baking activity with your kids.
Easy Chocolate Bunny Cookies
These bunny cookies are an adorable Easter treat that looks impressive but is surprisingly easy to make. Kids love helping decorate the bunny faces, and the peanut butter and chocolate combination is always a hit.
Ingredients
- Ready-to-bake cookie dough (I used peanut butter)
- Chocolate chips (about ½ cup)
- Optional: 1 tablespoon coconut oil or shortening to help the chocolate melt smoothly
- Round sprinkles for eyes
- Heart sprinkles for a nose (or any sprinkle you like)
You’ll also need:
- A melon baller or small cookie scoop
- A small fork or spoon with a thin handle and rounded end
- Optional: toothpick for adjusting sprinkles
How to make bunny cookies
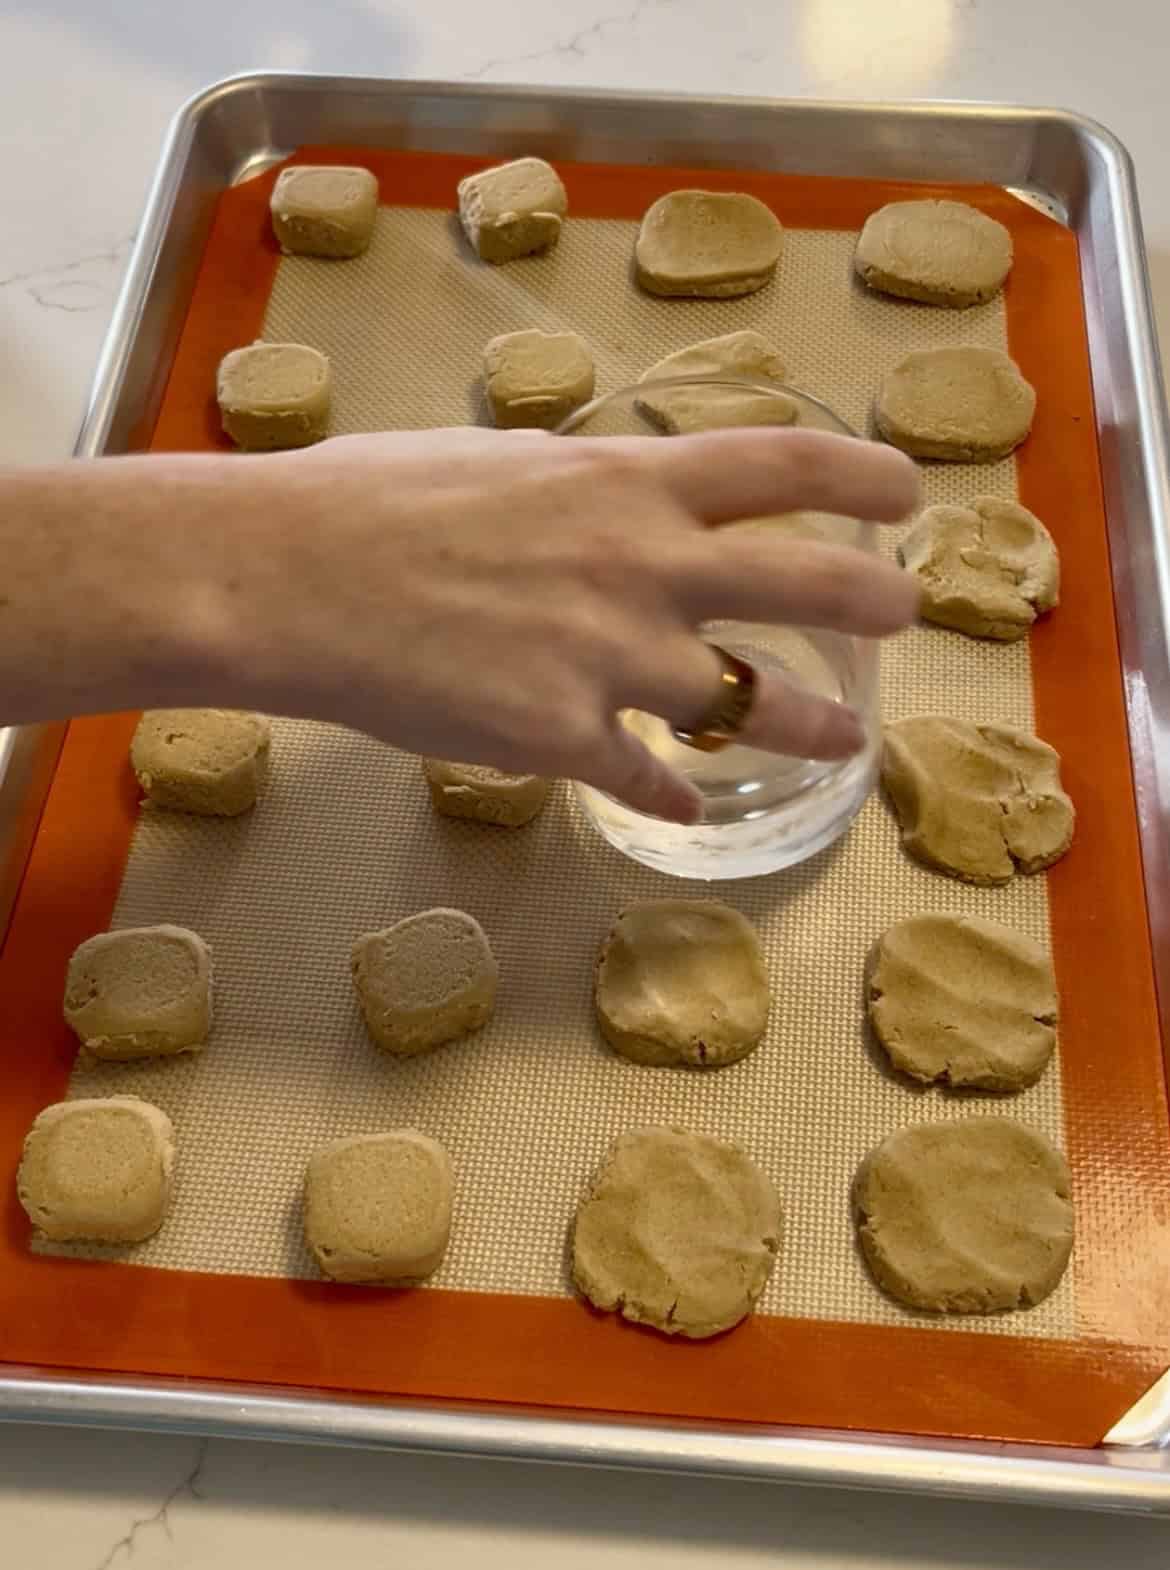
1. Flatten the cookie dough
Place balls of cookie dough on a baking sheet according to the package instructions.
Use your fingers or the bottom of a clean glass to gently press the dough slightly flat.
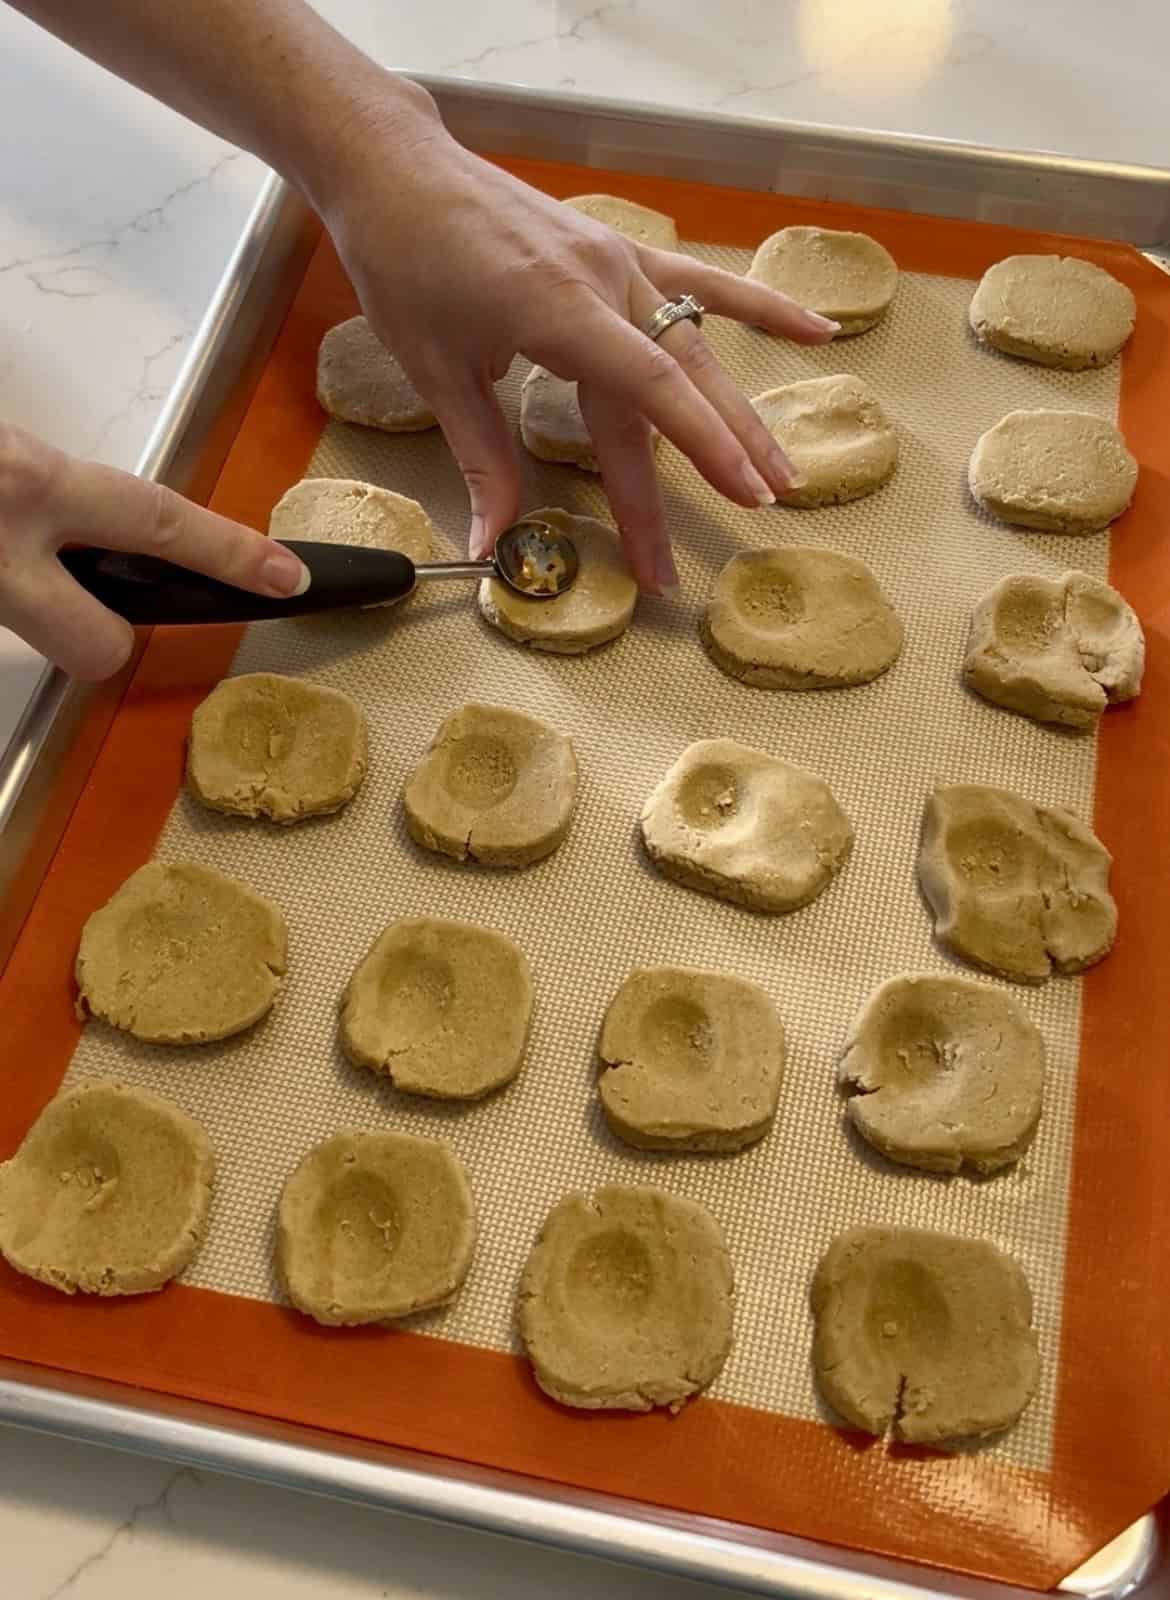
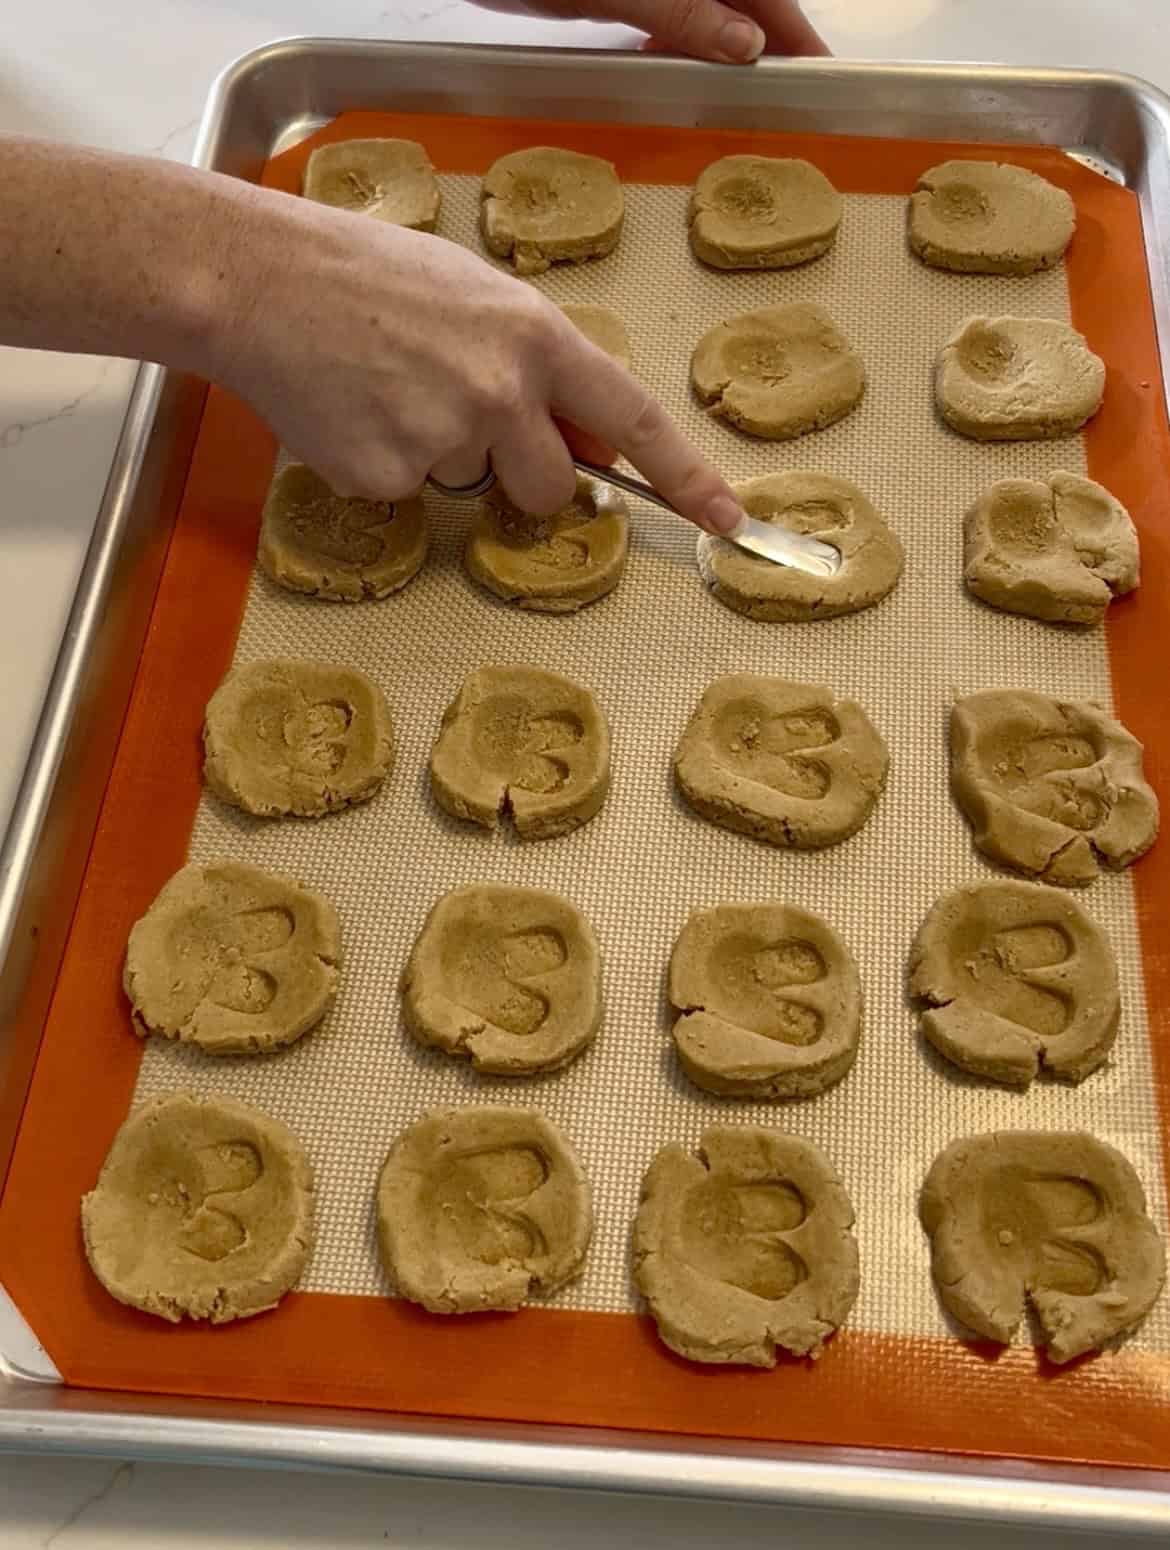
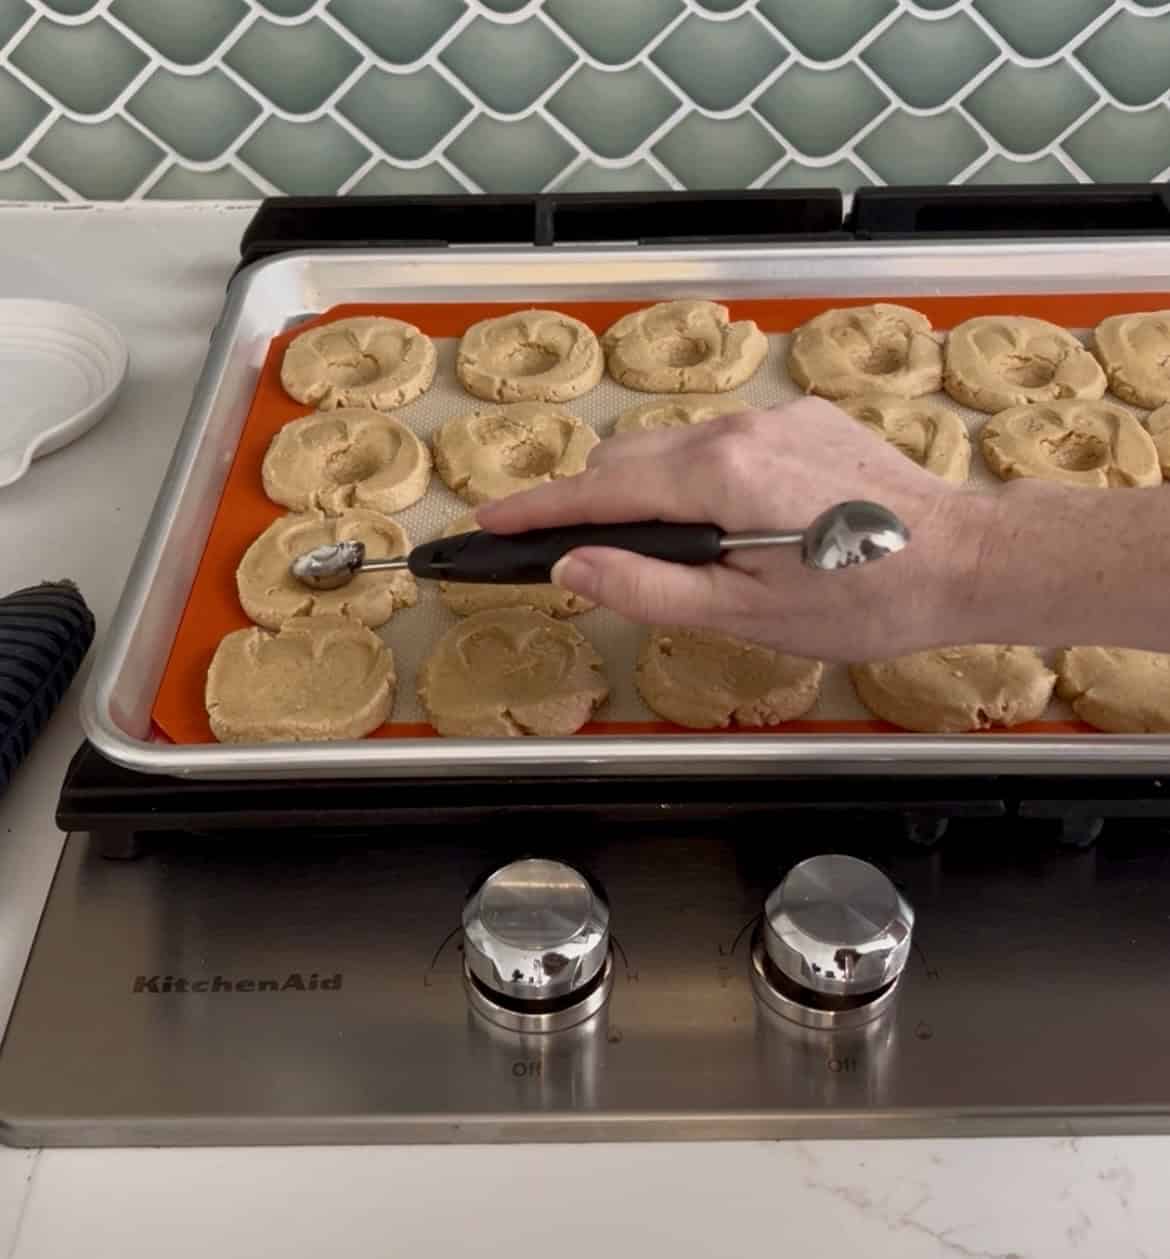
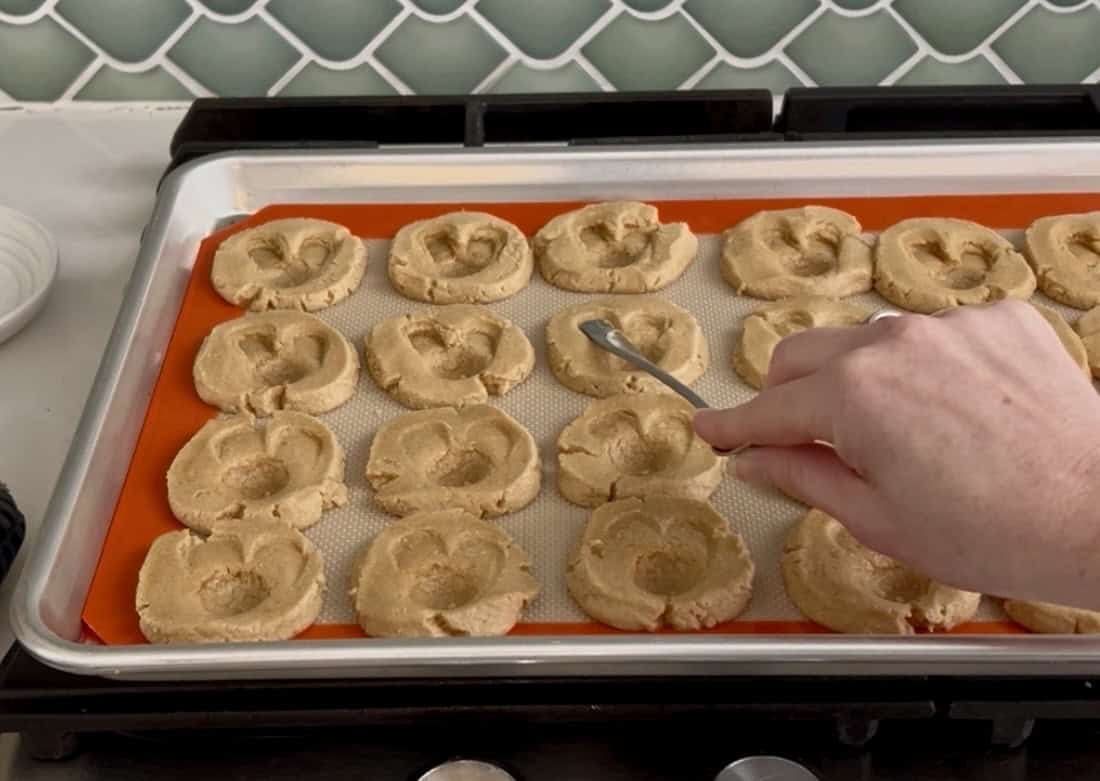
2. Create the bunny shape
Use a melon baller or small cookie scoop to press an indentation in the center of each cookie to form the bunny’s head.
Then use the rounded handle of a small fork or spoon (I used a pickle fork) to press two small indentations above the head to create bunny ears.
3. Bake the cookies
Bake according to the cookie dough package instructions.
You may notice the bunny shape softens a little during baking — that’s normal.
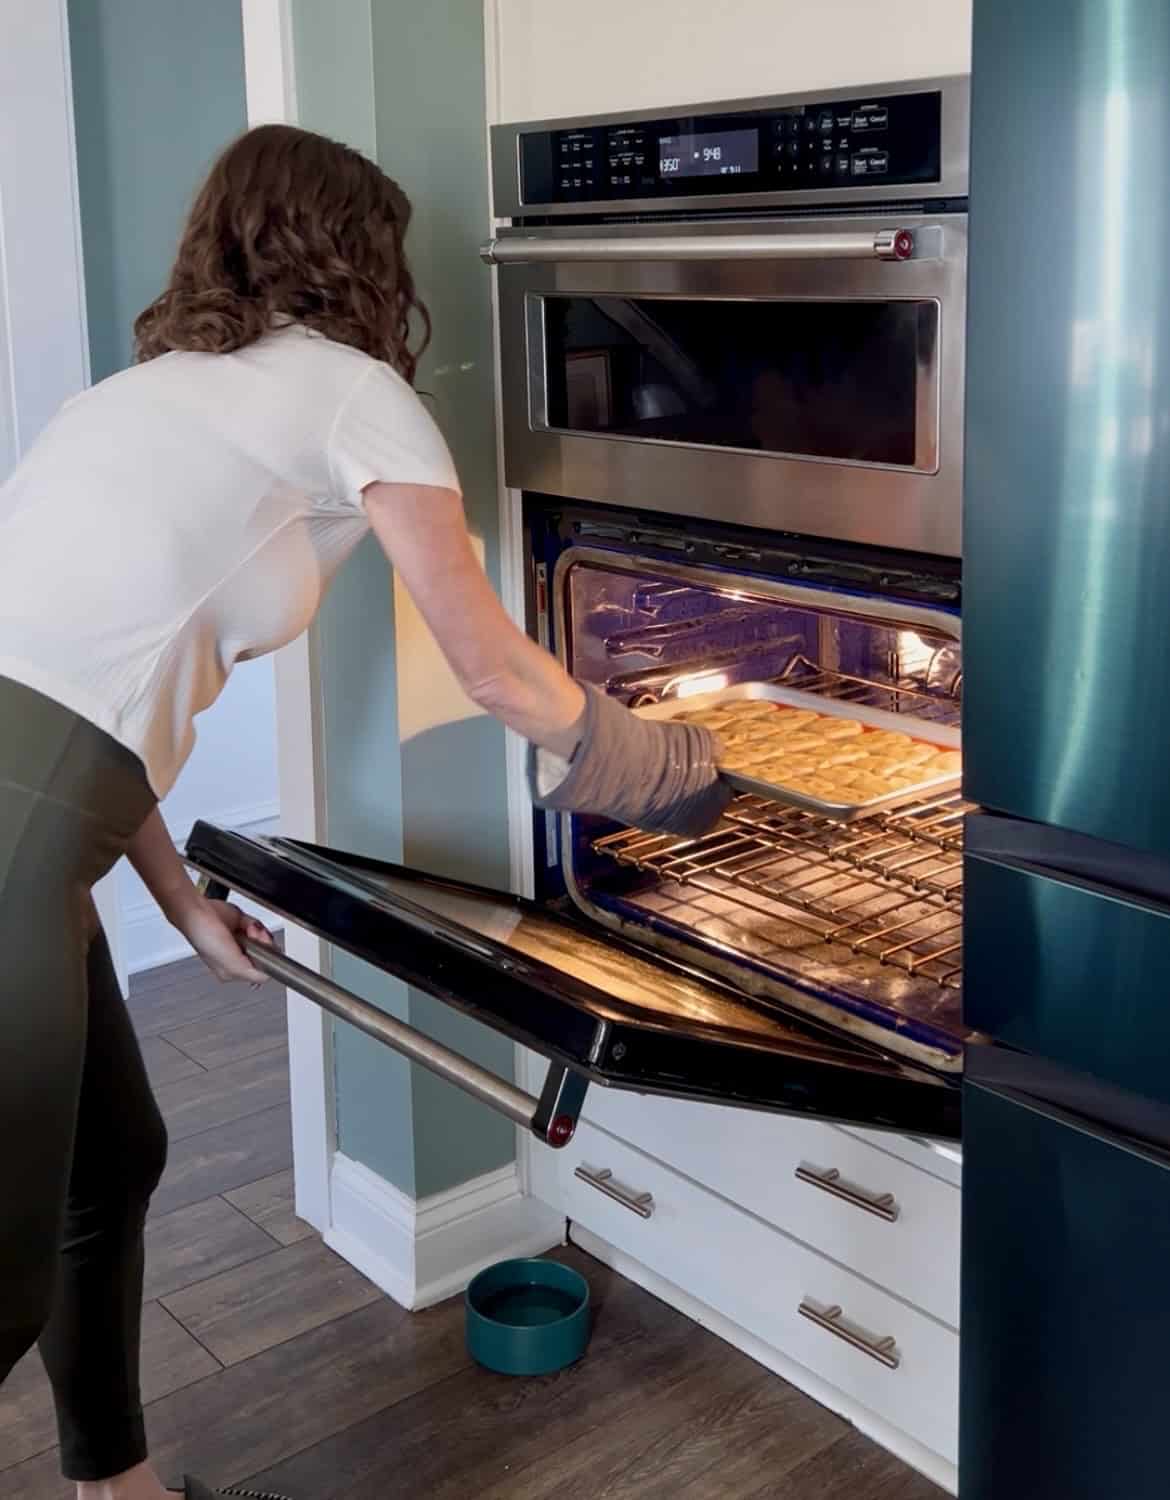
4. Re-shape while hot
When the cookies come out of the oven, immediately use the melon baller and spoon handle again to gently re-press the bunny head and ears.
Doing this while the cookies are still hot helps create a clean bunny shape.
Let the cookies cool completely.
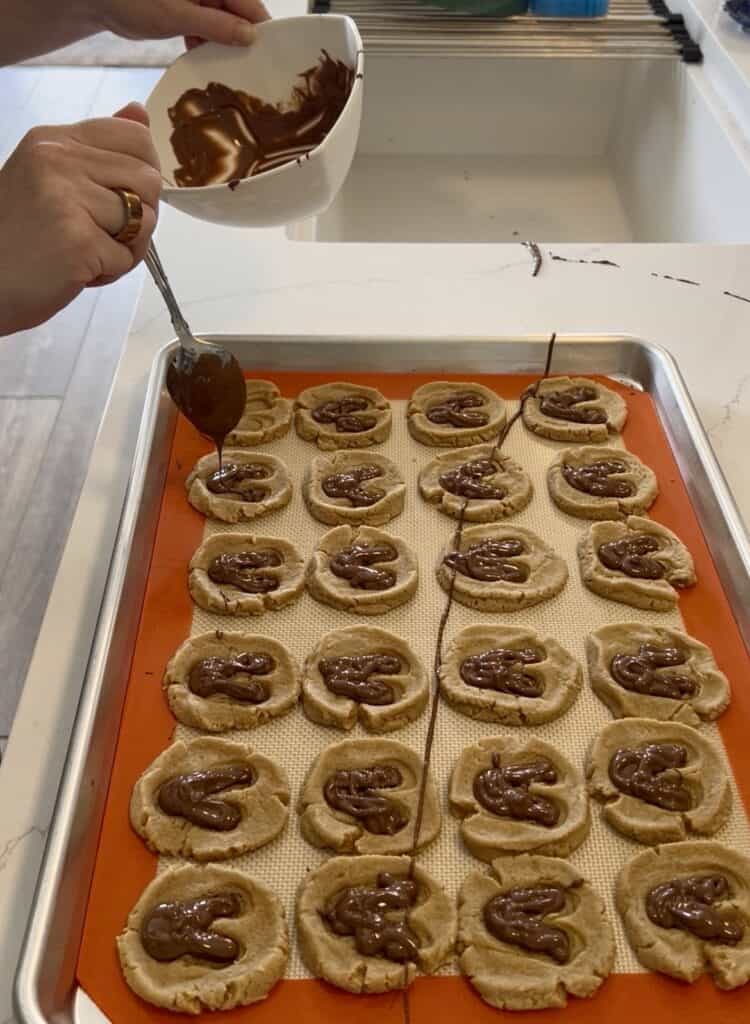
5. Melt the chocolate
Place the chocolate chips in a microwave-safe bowl.
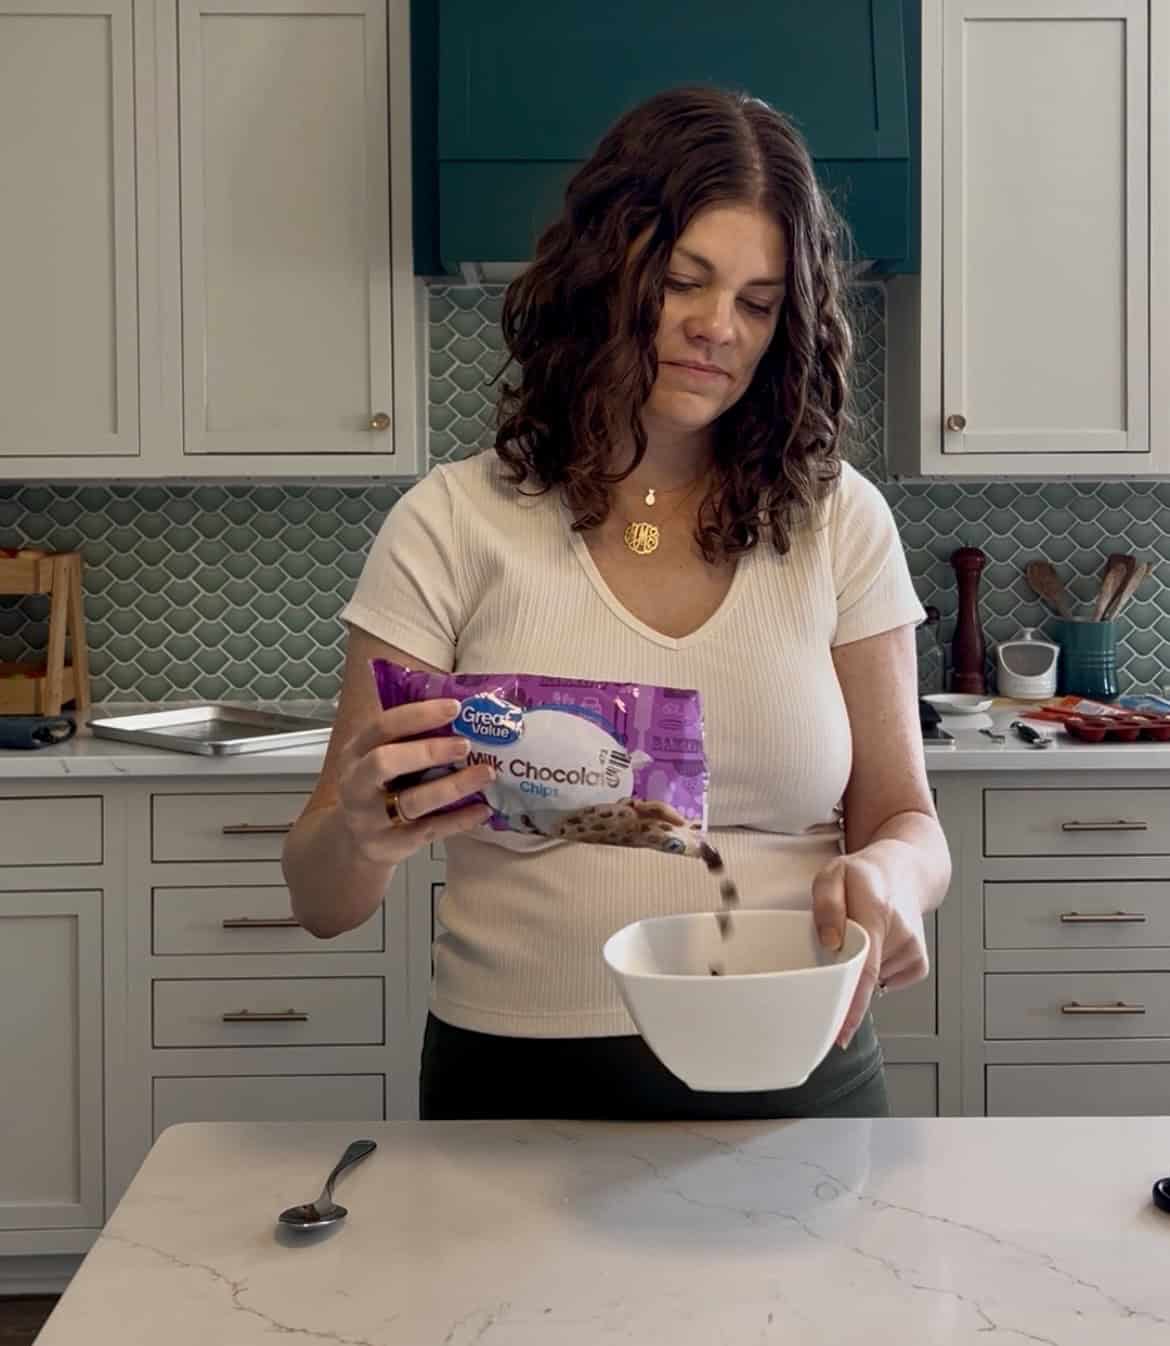
Microwave for 30 seconds at a time, stirring between each interval, until fully melted. If desired, stir in a little coconut oil or shortening to make the chocolate smoother.
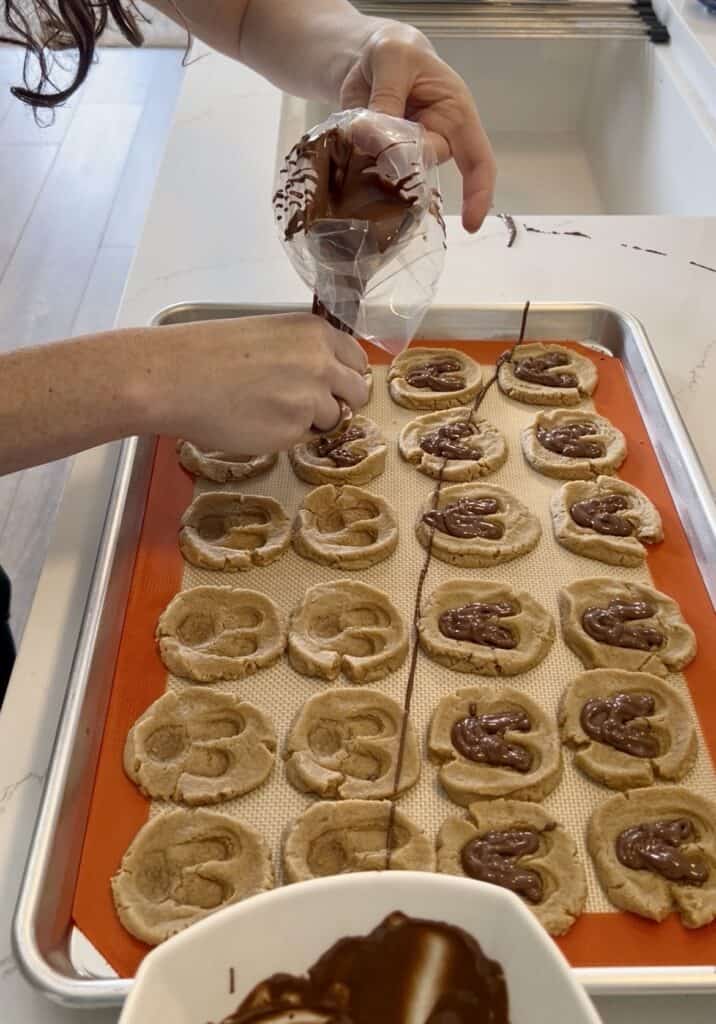
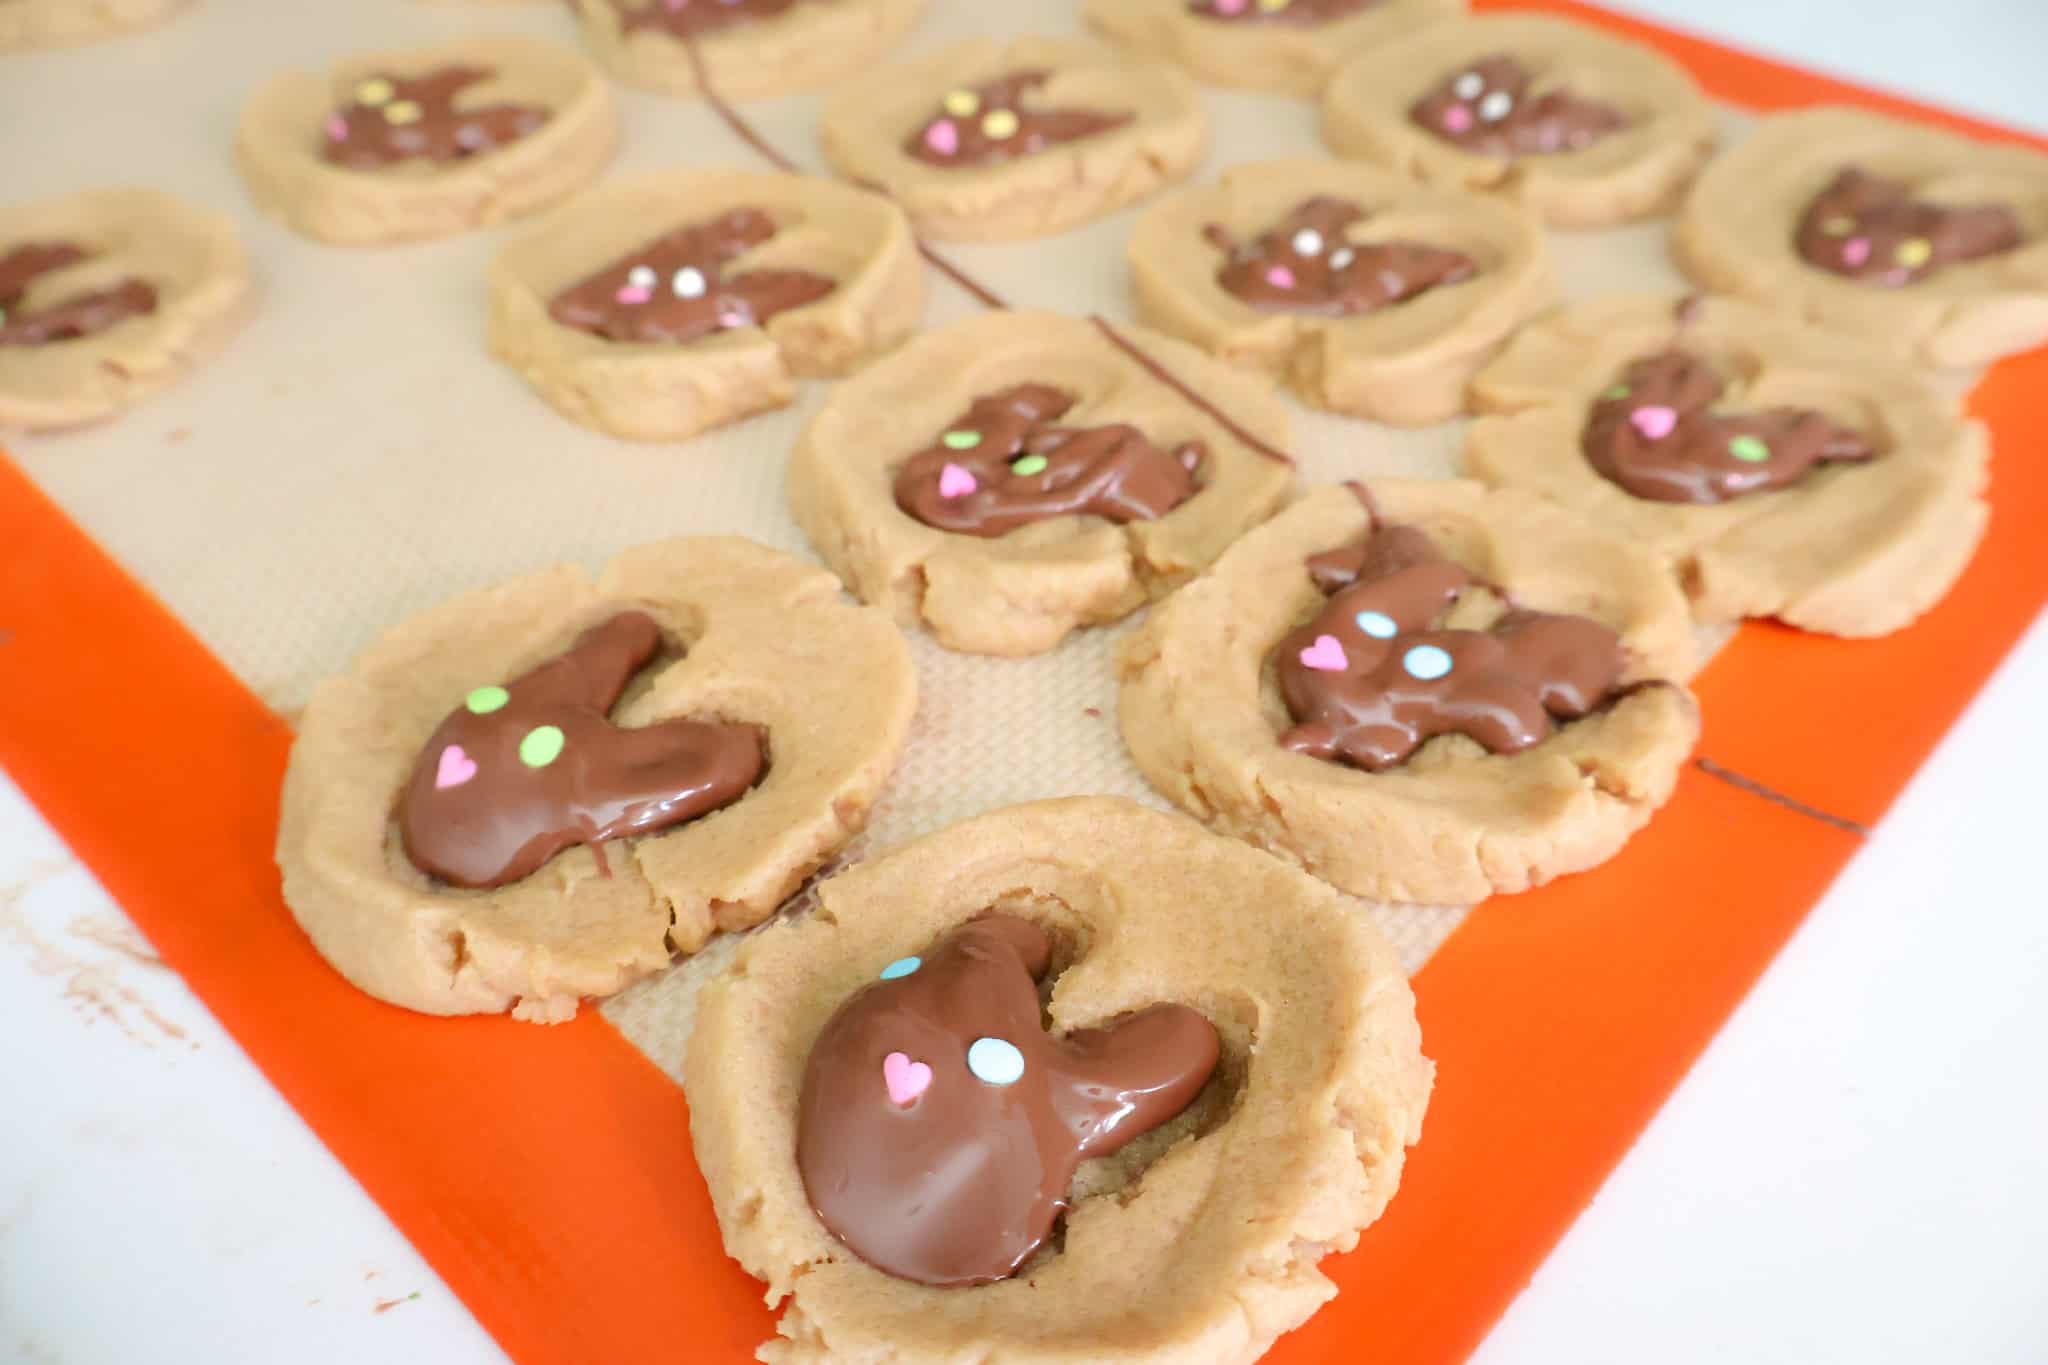
6. Fill the bunny shape
Use a small spoon or piping bag to fill the bunny head and ear indentations with melted chocolate so it forms a solid chocolate bunny shape.
7. Add the bunny face
While the chocolate is still soft, add:
- Two round sprinkles for eyes
- One heart sprinkle for the nose
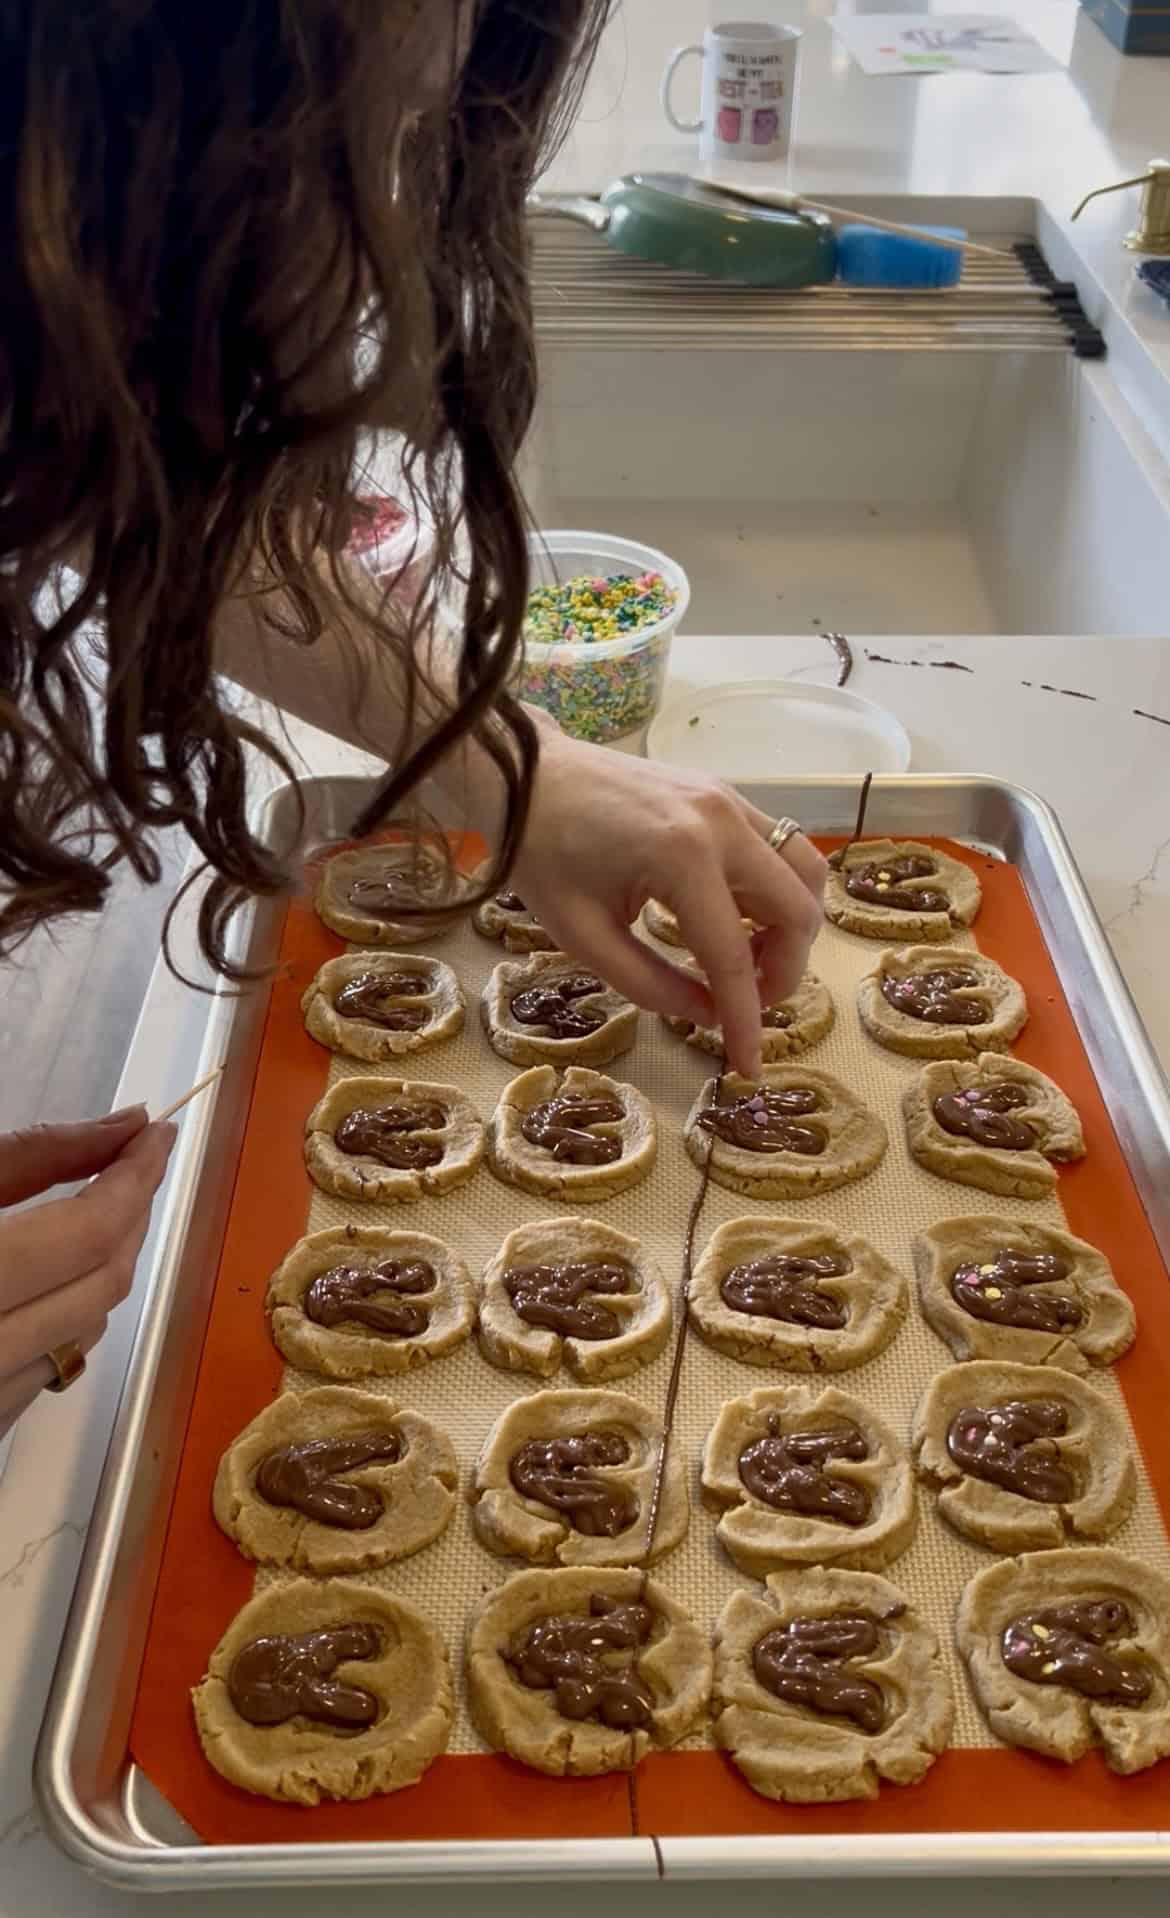
If needed, use a toothpick to gently nudge the sprinkles into place.
8. Let the chocolate set
Allow the cookies to cool completely so the chocolate can harden. You can also refrigerate them briefly to speed this up.
Tips for the cutest bunny cookies
- Press the shapes again while the cookies are hot to keep the bunny shape defined.
- A melon baller works perfectly for making the bunny head indentation.
- Use a toothpick to carefully adjust the sprinkles before the chocolate sets.
- Peanut butter cookies pair especially well with the chocolate filling.
A fun and easy Easter treat
These bunny cookies are one of those treats that looks like it took a lot of effort — but it really didn’t.
They’re cute, a little playful, and the peanut butter and chocolate combination makes them extra delicious.
Plus, they’re simple enough that kids can help decorate, which makes them a fun Easter baking activity too.
Thanks for reading!


Hey there, I'm Morgan, the creative mind behind CelebratingWithKids.com! As a parent of two lively little ones, I've made it my mission to turn ordinary days into extraordinary adventures, sharing playful activities, thoughtful toy reviews, and delightful printables to help families celebrate every moment together. 🎉👨👩👧👦🎈